- Empty Trash
- Delete Mail App
- Clear Cache on Mac
- Get More Storage on Mac
- Make Chrome Use Less RAM
- Where is Disk Utility on Mac
- Check History on Mac
- Control + Alt + Delete on Mac
- Check Memory on Mac
- Check History on Mac
- Delete An App on Mac
- Clear Cache Chrome on Mac
- Check Storage on Mac
- Clear Browser Cache on Mac
- Delete Favorite on Mac
- Check RAM on Mac
- Delete Browsing History on Mac
Helpful Guide on How to Clear DNS Cache on Mac Effectively
 Updated by Lisa Ou / Sept 07, 2023 09:15
Good day! I've been visiting a website on my Mac these past few days, but when I entered its site on the browser earlier, the page no longer appears. Due to this, I browsed online to figure out how to fix the problem, and it turns out I need to clear DNS cache. But before that, I must understand the situation better and learn to clear Mac DNS cache. Please help.
Are you having issues looking up a website or anything on your macOS? If so, you must have been advised to clean the DNS cache on your Mac. However, not everyone knows what DNS means and its function on a computer. If you are one of them, you can now be at ease, as you have just set foot in the right article. Fundamental information about DNS will be below to help you understand the need to clear its cache. After that, multiple methods with hassle-free instructions for clearing DNS caches will follow, so you only have to pick which one to execute on your Mac. That said, start acquiring the knowledge in this post to resolve your issues by wiping out your macOS DNS caches.


Guide List
Part 1. What is DNS Cache on Mac
DNS is short for Domain Name System. It is a naming system on the internet, services, and computers which translates domain names into IP addresses. As you may know, each device on the internet has a unique IP address, and they are the way to access websites. However, memorizing all these IP addresses would be difficult, so you only enter their website names. Once you enter a website name, DNS transforms it into an IP address, letting you access the website more easily.
Meanwhile, you must wonder what happens when your Mac clears DNS caches. As you look up more websites on your computer, you accumulate more DNS caches. Hence, DNS caches are temporary storage containing information about your previous searches on a Mac or web browser. But when a cache becomes corrupt or outdated, you will likely experience an issue while browsing. For instance, you won’t be able to access a website if it changes its IP address since the one saved on your computer is old. Therefore, you can try to clean your DNS caches when this happens.

With FoneLab Mac Sweep, you will Clear system, email, photo, iTunes junk files to free up space on Mac.
- Manage similar photos and dulplicate files.
- Show you the detailed status of Mac with ease.
- Empty trash bin to get more storage.
Part 2. Clear DNS Cache on Mac
Clearing DNS caches on your Mac erases all the previous DNS information. Hence, it also removes the old, corrupted, or damaged ones. So, once they are cleared, your macOS will collect updated DNS information. The caches that caused issues will disappear, letting you visit various websites more efficiently. And please choose the following demonstration depends on your macOS versions.
Option 1. Flush DNS Cache on macOS Monterey (version 12.6)
Relying on the Terminal app is the primary solution to clear DNS caches on your Mac. The terminal is a macOS command-line interface that lets you enter a command to perform a certain operation on the computer. Each process has a designated command, so you only have to use the one for clearing DNS caches on the Terminal interface for your situation.
Act according to the painless steps underneath to clear DNS cache on Mac by flushing them on the Terminal app:
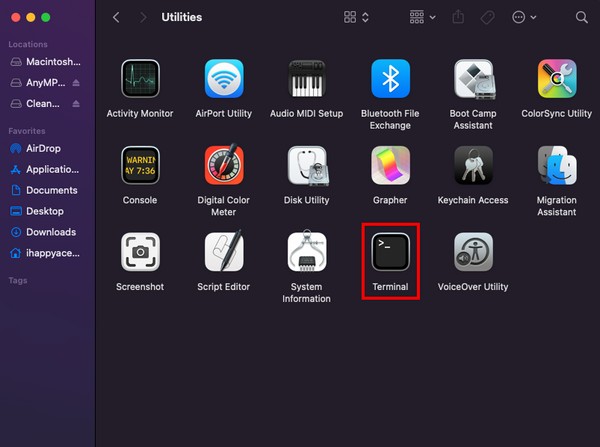
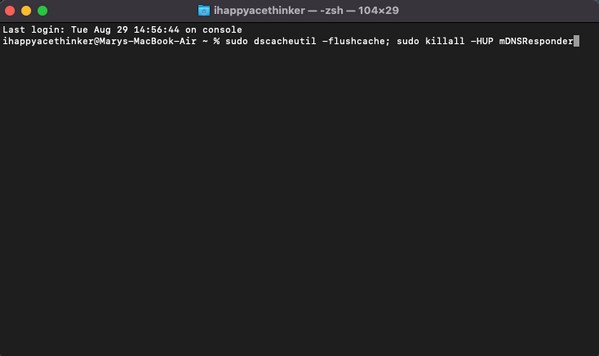
Step 1Unlock your Mac and access the Applications folder. When the apps display, open Utilities, then click Terminal to launch the app. Afterward, enter sudo dscacheutil -flushcache; sudo killall -HUP mDNSResponder on its interface.
Step 2Expect the app to prompt you to enter your Mac password. Type it, then hit Enter on the keyboard. A “mDNSResponder: restarted.” message will appear on the screen, indicating that your DNS caches have successfully been flushed.
Option 2. Flush DNS on macOS Mojave (version 10.14)
Like the previous option, this method also uses the Terminal app. They have almost all the same steps and instructions, making it much easier and quicker. The only primary difference is the command since you’re performing the process on a macOS Mojave this time.
Obey the unexacting instructions below to determine how to clear DNS cache on macOS Mojave on Terminal:
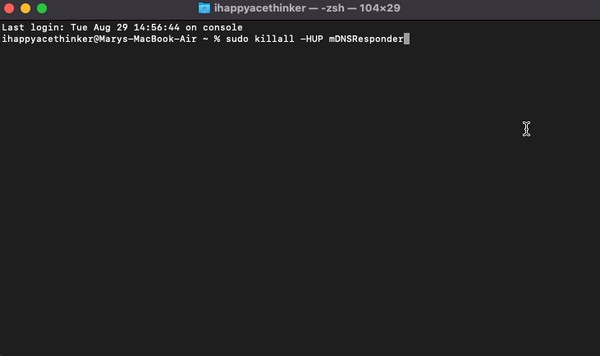
Step 1Open the Terminal app through the Applications > Utilities folders. When the app interface launches, enter sudo killall -HUP mDNSResponder on the screen.
Step 2Type the password and click Enter/Return when the app prompts you to enter your Mac password. A message saying you have successfully cleared the DNS caches will then show.
Part 3. How to Clear Cache on Mac with FoneLab Mac Sweep
Once you’ve cleared DNS caches, try installing FoneLab Mac Sweep to clear other caches. If you’d like to clean your Mac further, this tool will help greatly in wiping out unnecessary files, caches, history, and other junk on the computer. Besides browser data, its capability includes clearing system and application caches, so its range in cleaning is much wider and quicker than when clearing each junk individually. Also, enjoy the tool’s bonus features, including the Status display that lets you view your Mac CPU, Memory, and Disk conditions.
With FoneLab Mac Sweep, you will Clear system, email, photo, iTunes junk files to free up space on Mac.
- Manage similar photos and dulplicate files.
- Show you the detailed status of Mac with ease.
- Empty trash bin to get more storage.
Grab the stress-free guidelines underneath as a pattern for clearing caches on your Mac with FoneLab Mac Sweep:
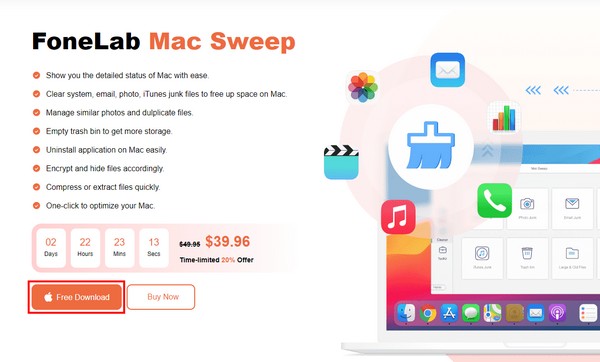
Step 1Stop by the FoneLab Mac Sweep site on your browser, then save its installer file using the Free Download button. It is located beneath the tool descriptions, so you can read them while the download is in progress. Other details about the program are also available once you scroll down. When done, move the tool to the Applications folder and run it.
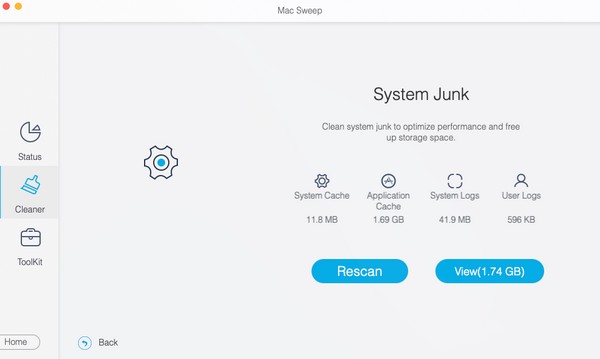
Step 2The tool’s interface will let you choose between the Status, Cleaner, and ToolKit features. Select Cleaner, and the Mac junk types, such as System Junk, iPhoto Junk, etc., will display. Choose the System Junk box containing the system and app caches on your Mac. Afterward, hit the Scan tab, then View when the scanning process is done.
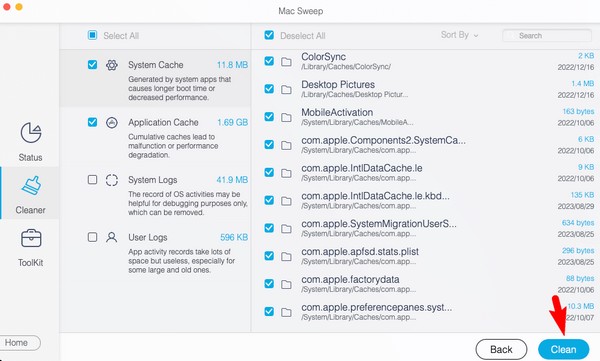
Step 3Your Mac junk categories will be on the following interface’s left portion. Check the System and Application Caches for deleting the entire classification or only the specific cache files on the right side. After selecting, press the Clean button on the interface’s leftmost bottom to remove the chosen caches from your Mac computer permanently.
With FoneLab Mac Sweep, you will Clear system, email, photo, iTunes junk files to free up space on Mac.
- Manage similar photos and dulplicate files.
- Show you the detailed status of Mac with ease.
- Empty trash bin to get more storage.
Part 4. FAQs about How to Clear DNS Cache on Mac
1. How do I check DNS caches on my Mac?
Check the DNS caches on your Mac by running the Console app. You will find it by entering Finder > Applications > Utilities. Alternatively, enter the app name in the spotlight search at the top right of your desktop. Once accessed, click your Mac in the left pane, then enter “any:mdnsresponder” in the search field. Next, open Terminal and enter the “sudo killall -INFO mDNSResponder” command. Afterward, your DNS caches list will display once you return to the Console app.
2. Is it fine to clean my Mac DNS cache?
Yes, it is. DNS caches let your Mac load the websites you visit faster, but clearing them sometimes is also advantageous. Flushing DNS caches ensures your cache information is up-to-date, so cleaning or removing them from your Mac is fine.
Trust the information and suggested methods above, and it is guaranteed you will efficiently clean the DNS caches on your Mac. Moreover, you can also expect the FoneLab Mac Sweep to clean it better.
With FoneLab Mac Sweep, you will Clear system, email, photo, iTunes junk files to free up space on Mac.
- Manage similar photos and dulplicate files.
- Show you the detailed status of Mac with ease.
- Empty trash bin to get more storage.