- Empty Trash
- Delete Mail App
- Clear Cache on Mac
- Get More Storage on Mac
- Make Chrome Use Less RAM
- Where is Disk Utility on Mac
- Check History on Mac
- Control + Alt + Delete on Mac
- Check Memory on Mac
- Check History on Mac
- Delete An App on Mac
- Clear Cache Chrome on Mac
- Check Storage on Mac
- Clear Browser Cache on Mac
- Delete Favorite on Mac
- Check RAM on Mac
- Delete Browsing History on Mac
Matchless Strategies to Transfer Mac to Mac Easily
 Updated by Lisa Ou / Sept 26, 2023 09:15
Do you have a Mac file to share with your friend, a Mac user? Or have you purchased a new Mac and plan to move the data to it from your older one? Regardless of the situation, this article shows you the best procedures for transferring data from one Mac to another. Sharing files between an iOS and a macOS is usual since many Apple device users most likely own an iPhone and Mac simultaneously. Hence, it's easier for them to transfer data between the two. On the other hand, the ways to transfer files from Mac to Mac are not usual, so you may feel confused when put in such a situation.
With this in mind, we have gathered outstanding techniques for transferring photos, videos, documents, and other data from your Mac to another. To guarantee you will accomplish the sharing process without problems, we included only the official transfer methods on Mac with a high success rate. We have also simplified the procedure and discussed them step-by-step to help you perform them more easily. Aside from that, a special program to keep your Mac healthy will be presented as a tip.


Guide List
Part 1. How to Transfer Mac to Mac via AirDrop
AirDrop is among the most popular transfer techniques for Apple users. If you own two Apple devices or have someone who also possesses iOS, iPadOS or macOS, you have probably experienced sharing files using AirDrop. While it is the normal sharing method for iPhone users, you may be unaware of how to use it on a Mac. If so, we have good news for you. The process is mostly the same; you only have to choose the designated options on Mac to transfer your data with this method successfully.
Stick to the undemanding steps underneath to determine how to transfer files from Mac to Mac via AirDrop:
Step 1Enable WiFi and Bluetooth on both Mac sender and receiver. Next, open Finder on the Mac sender and find the data you wish to transfer. When found, double-click it to open and select the Share icon. Afterward, choose AirDrop from the sharing options.

Step 2On the Mac receiver, click Go > AirDrop and ensure the WiFi and Bluetooth are turned on. The Mac receiver icon will then appear on the sender’s AirDrop interface. Click it, and the receiver will be notified of the transfer request. Hit Accept, and the file will be transferred shortly.

With FoneLab Mac Sweep, you will Clear system, email, photo, iTunes junk files to free up space on Mac.
- Manage similar photos and dulplicate files.
- Show you the detailed status of Mac with ease.
- Empty trash bin to get more storage.
Part 2. How to Transfer Mac to Mac from Time Machine
Unlike the previous strategy, Time Machine is not on other Apple devices besides macOS, so this may be your first time hearing about it. To brief you about this feature, know that Time Machine is a built-in function that lets you back up your Mac data in a backup disk, including photos, apps, music, and more. Once you have them backed up, you can input the disk to another Mac and restore your backup, which is a helpful transfer method.
Take to heart the simple process below to transfer Mac to Mac using Time Machine:
Step 1Input a backup disk on the Mac sender and launch Time Machine. The disk will appear on the interface, so click it to select the option for backing your Mac data in it. Once your content is on the backup disk, input it into the receiver Mac and open Migration Assistant.

Step 2Follow along with the startups, then select From a Mac, Time Machine backup or Startup Disk once the option appears. After that, choose the data you will transfer and click Continue to move them to your Mac.
Part 3. How to Transfer Mac to Mac Using Migration Assistant
Meanwhile, Migration Assistant is primarily used for transferring data from an old to a new Mac. With this built-in feature, you can copy your content to your new macOS without deleting it on the older one. However, the data this method can transfer is more limited than the other techniques. It allows you to transfer apps, files, accounts, folders, etc., and you have to choose them by category.
Act by the convenient instructions underneath to understand how to transfer Mac to Mac using Migration Assistant:
Step 1Link both macOS to the same network, then launch Migration Assistant to set up the startup instructions. Once you reach the transfer information options screen, select To another Mac on the old Mac and hit Continue. Meanwhile, choose From a Mac, Time Machine backup or Startup Disk on the new one.
Step 2When the data types are displayed on the new Mac, pick the items you wish to transfer, such as Applications, System & Network, etc. Next, click Continue, and the selected data will transfer from the old to your new Mac.
Part 4. How to Clear Space on Mac with FoneLab Mac Sweep
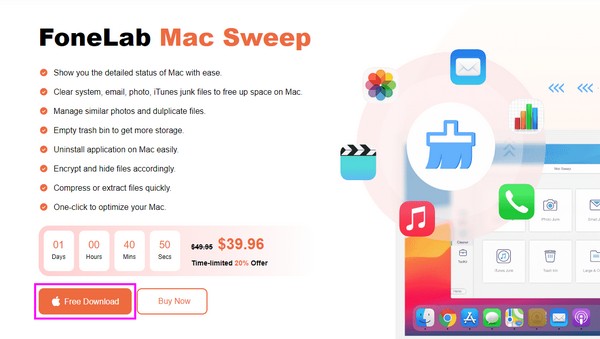
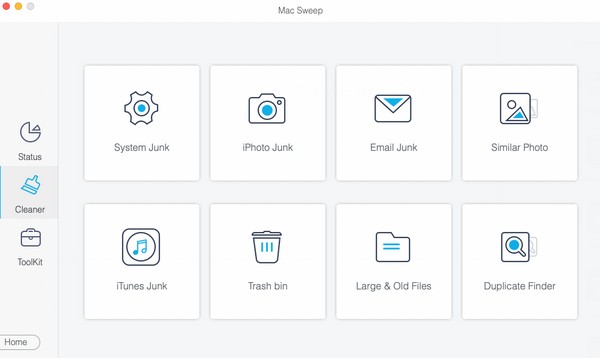
When you’re done handling the transfer of your data, try installing FoneLab Mac Sweep afterward. If you plan to clean your Mac after moving your important files to another, this must be the help you’ve been waiting for. Its capabilities will assist you in maintaining your Mac's health in its best condition. With its cleaning functions, all the unwanted data you wish to remove will disappear by only navigating a few options. But don’t worry; its straightforward interface will provide the necessary information to help you avoid getting lost in the process. It removes the regular data types and junk like system junk, iTunes junk, iPhoto junk, etc. Explore it further after installing the program.
With FoneLab Mac Sweep, you will Clear system, email, photo, iTunes junk files to free up space on Mac.
- Manage similar photos and dulplicate files.
- Show you the detailed status of Mac with ease.
- Empty trash bin to get more storage.
Identify the trouble-free procedure below as a model for clearing space on a Mac with FoneLab Mac Sweep:
Step 1Save the FoneLab Mac Sweep installer on your Mac using a browser to visit its page, then click Free Download. When saved, direct it to the Applications folder and double-click the program icon to launch the cleaner.
Step 2You will notice 3 features on the prime interface, and you may click the one you prefer to use first. If you have chosen the Cleaner box, junk and data types will be on the following screen. Choose from them.
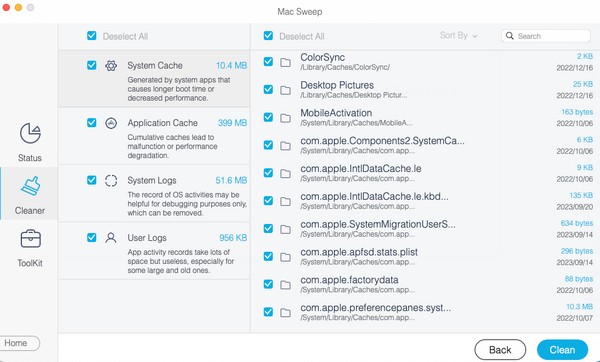
Step 3Afterward, hit Scan, then View to read and display your selected data. Later, check the junk, files, or data you desire to eliminate and click Clean to remove them and clear space on your Mac.
Part 5. FAQs about How to Transfer Mac to Mac
1. Why can't I transfer from my Mac to another using AirDrop?
The distance between your Mac computers may be too much. When transferring data using AirDrop, it's important to note that your devices must be nearby. Or else the transfer process will likely fail. Also, WiFi and Bluetooth must be enabled, as mentioned in Part 1 of this article.
2. What is the fastest method to transfer from Mac to Mac?
AirDrop is the recommended feature if you only have a few files to transfer. It has the simplest process and requirements, so moving your files with it will be fast. But if you want to share most of your data, try Migration Assistant.
Your data transferring from Mac to Mac concern can be quickly resolved with the procedures above. For more solutions like these, come to see the FoneLab Mac Sweep site whenever.
With FoneLab Mac Sweep, you will Clear system, email, photo, iTunes junk files to free up space on Mac.
- Manage similar photos and dulplicate files.
- Show you the detailed status of Mac with ease.
- Empty trash bin to get more storage.