- Empty Trash
- Delete Mail App
- Clear Cache on Mac
- Get More Storage on Mac
- Make Chrome Use Less RAM
- Where is Disk Utility on Mac
- Check History on Mac
- Control + Alt + Delete on Mac
- Check Memory on Mac
- Check History on Mac
- Delete An App on Mac
- Clear Cache Chrome on Mac
- Check Storage on Mac
- Clear Browser Cache on Mac
- Delete Favorite on Mac
- Check RAM on Mac
- Delete Browsing History on Mac
Compress Folder on Mac Using Preeminent Techniques
 Updated by Lisa Ou / Oct 18, 2023 09:15
Do you have files you don't currently use but are hesitant to delete? If so, make yourself aware of how to compress a folder on a Mac. It's a great strategy if you're trying to save space on your storage but have too many files. You can simply store the files you rarely use in a folder, then compress the folder until the time comes when you need them again. Or, you might want to send multiple files at once, then compressing these files in a folder will be a good idea. Compressing a file or folder makes your data unreadable, so expect you won't be able to view them for a while unless you decide to remove them from compression.
On the bright side, your files' sizes will be reduced once compressed, solving your storage or file size limitation problems. Hence, compressing and not viewing the data you rarely use helps not only for freeing up space. It also helps in organizing your data. If you try to discover methods on the web, various compression practices will be provided, but not all are fast and reliable. That's why we have tested several of them and assembled the most effective ones below. Simply execute the instructions properly, and your folders will be compressed in no time.


Guide List
Part 1. How to Compress A Folder on Mac
In this part, we will introduce 2 proven and effective methods to compress your folder on Mac within a few clicks.

With FoneLab Mac Sweep, you will Clear system, email, photo, iTunes junk files to free up space on Mac.
- Manage similar photos and dulplicate files.
- Show you the detailed status of Mac with ease.
- Empty trash bin to get more storage.
Option 1. Compress Folders on Mac through Finder
Finder is the primary location you must access if you want to compress your folders. It contains almost all the data stored on your Mac, including images, videos, documents, apps, music files, and more. Thus, it is also where you will likely find the folders you wish to compress. Moreover, it is where you will find the option to compress them. Regardless of whether you will compress a file or folder, you can easily process them in the Finder interface as long as you navigate the steps or instructions properly.
Heed to the secure procedure underneath to compress folders on Mac through Finder:
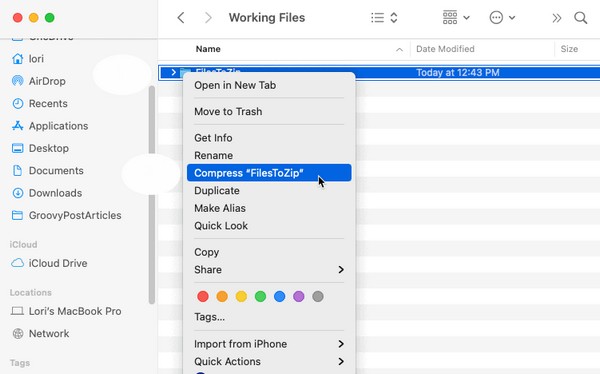
Step 1Locate your Mac Finder on the lowermost section of your desktop. It is normally shown on the left of the Dock, so it won’t be difficult to find. Open it and put the folder you’d like to compress on view. You may also create a folder and put all the files you wish to compress inside.
Step 2Once the folder is on the window, control-click it to reveal the options. On the shortcut menu, hit the Compress tab to compress the folder successfully. The folder will then switch to the .zip extension, which indicates the folder has been compressed.
Option 2. How to Compress A Folder on Mac via Third-Party App
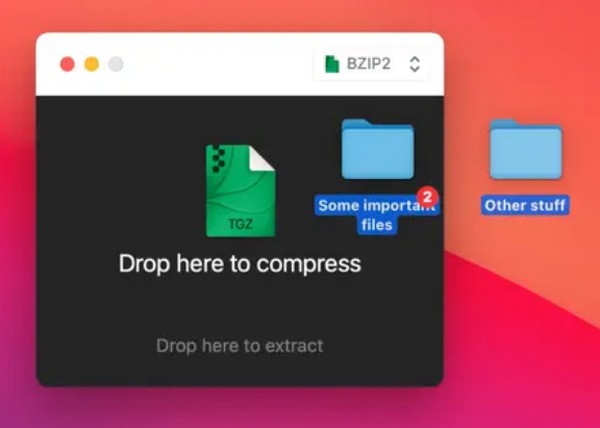
Now that you’ve discovered one of the most efficient methods above, how about learning a third-party app? Keka is a compression app that is designed for macOS. It is obtainable on the App Store, letting you get it on your Mac anytime. It supports numerous formats and can quickly make your folder size smaller within seconds, especially since it doesn’t involve complex steps.
Additionally, Keka’s Finder Extention is automatically added to the Finder toolbar, which makes the compression much easier. The only thing you may need to note is that the newest version of this app is still a beta version. Thus, it may still contain bugs and other issues.
Go along with the worry-free process below to understand how to compress a folder on Mac via the third-party app, Keka:
Step 1Find your way into the App Store and search for the Keka app to get it and launch it on your Mac. Afterward, set it up so that you can begin using the app.
Step 2Once set up, drag your folder into its interface, and it will automatically be compressed afterward.
Part 2. How to Decompress A Folder on Mac with FoneLab Mac Sweep
On the contrary, FoneLab Mac Sweep is a tool for decompressing files or folders. Since you have the strategies for compressing, consider getting this program to remove your folders from compression later. Using the correct procedure, FoneLab Mac Sweep will let you decompress your files or folders once you wish to view or access them.
With FoneLab Mac Sweep, you will Clear system, email, photo, iTunes junk files to free up space on Mac.
- Manage similar photos and dulplicate files.
- Show you the detailed status of Mac with ease.
- Empty trash bin to get more storage.
Also, with its specialized cleaning functions, you can quickly erase unwanted files on your Mac, freeing up considerable storage. This program also categorizes your data on its interface, allowing you to determine the files you will likely plan to remove from the computer faster. Aside from that, its clean interface will provide a more convenient process. Enjoy its benefits after installation.
Use the unexacting instructions below as a pattern of how to decompress a folder on a Mac with FoneLab Mac Sweep:
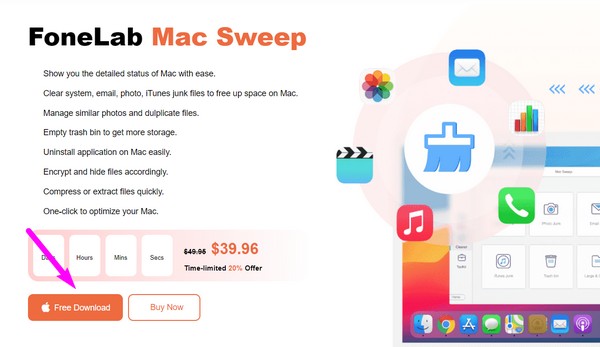
Step 1Discover and view the FoneLab Mac Sweep page on your Mac browser. Then, you will get a glimpse of the Free Download tab on the lower left section of the page. Click it, and while downloading the program file, check out its description above to understand its features. Next, move the file inside the Applications folder and begin running the program.
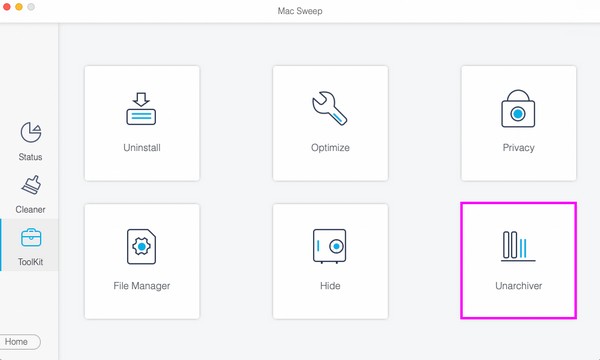
Step 2The program’s key interface will present the tool features, including the ToolKit, Cleaner, and Status. To find the decompression function, proceed to the ToolKit box. It will show various features, such as Uninstall, Privacy, Unarchiver, and more. Hit the Unarchiver selection to move to the function for decompressing.
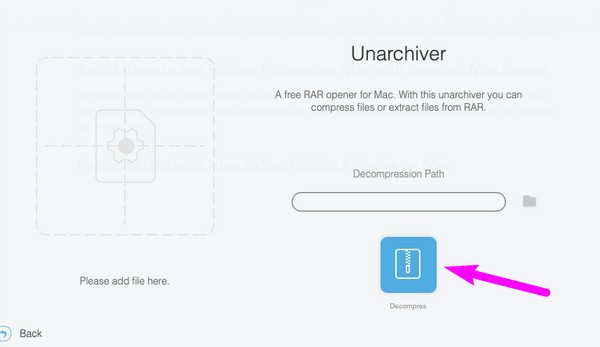
Step 3You will see a box on the following interface’s left. Drag the folder you desire to decompress into the box, then select the Decompress button on the lower right to finish the process.
When decompressing folders or files, you must ensure you have enough storage. If not, use this tool’s cleaning functions, as told above, to erase unwanted files and free up space.
With FoneLab Mac Sweep, you will Clear system, email, photo, iTunes junk files to free up space on Mac.
- Manage similar photos and dulplicate files.
- Show you the detailed status of Mac with ease.
- Empty trash bin to get more storage.
Part 3. FAQs about How to Compress A Folder on Mac
1. How do I decrease the file size of a folder on my Mac?
The most popular way to reduce the size of a file or folder is through compressing. Whether you are running macOS, Windows, etc., there is always a way to compress your files. Thankfully, we have already gathered the strategies for this on Mac, and you can check them out in the article above. With the provided compression methods, your folders' file sizes will be reduced successfully within seconds, depending on your chosen technique.
2. Why can't I open the folder after compressing on Mac?
It's because compressed folders or even individual files cannot be opened. Once you compress, the folder will no longer be available to view or access. To open them, you must decompress or extract the folder first. See this article's Part 3 to learn how to decompress. This way, your folders will return to their usual size and condition, letting you open them again normally. Hence, a tool like FoneLab Mac Sweep will be helpful if you compress and decompress files or folders now and then.
Thanks for choosing this article to learn how to compress your folders on a Mac. Informational posts like this are also available once you explore the FoneLab Mac Sweep page.
With FoneLab Mac Sweep, you will Clear system, email, photo, iTunes junk files to free up space on Mac.
- Manage similar photos and dulplicate files.
- Show you the detailed status of Mac with ease.
- Empty trash bin to get more storage.