- Empty Trash
- Delete Mail App
- Clear Cache on Mac
- Get More Storage on Mac
- Make Chrome Use Less RAM
- Where is Disk Utility on Mac
- Check History on Mac
- Control + Alt + Delete on Mac
- Check Memory on Mac
- Check History on Mac
- Delete An App on Mac
- Clear Cache Chrome on Mac
- Check Storage on Mac
- Clear Browser Cache on Mac
- Delete Favorite on Mac
- Check RAM on Mac
- Delete Browsing History on Mac
Detailed Guide on How to Password Protect A Zip File Mac
 Updated by Lisa Ou / Oct 25, 2023 09:15
Many people think that zipping a file can protect it from various harms it could encounter. But the unfortunate truth is that it may not be enough to keep it completely safe. It can still be accessible to other people borrowing or accessing your Mac. They can easily open and view your files even if they are already zipped. That's why several Mac users wish to know how to password-protect zip file Mac. If you are among them, you have come to the right article.
Whether you are protecting a file, device, account, etc., the most effective move you can perform is adding a password. If you want to protect your possessions, you can never go wrong with a password. By adding it to your files, no one will be able to access them without your permission, especially if the password you set is strong and difficult to guess.


Guide List
Part 1. How to Password Protect Zip Files on Mac
After browsing the web, we have encountered numerous strategies to password-protect your zip files on Mac. Because of that, we were able to list the 2 most effective ones below, and you only need to comply with the directions correctly to keep your zip files safe with a password.

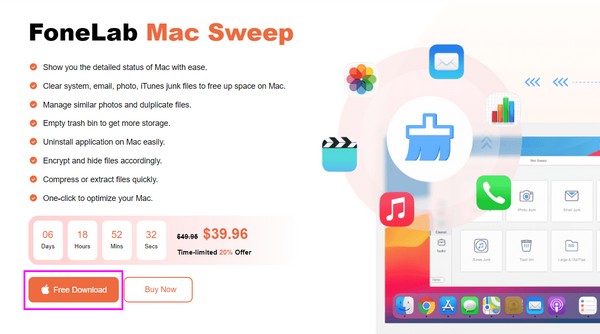
With FoneLab Mac Sweep, you will Clear system, email, photo, iTunes junk files to free up space on Mac.
- Manage similar photos and dulplicate files.
- Show you the detailed status of Mac with ease.
- Empty trash bin to get more storage.
Option 1. Password Protect Zip File on Mac Terminal
Terminal is a built-in program on macOS. It offers a command-line interface that allows you to handle various processes, such as protecting your zip file with a password. You manage different options on your Mac with this program by only entering the designated command for the process you want to perform. Hence, you only need to discover the right command for password-protecting a zip file and enter it on the Terminal interface to encrypt your file.
Mimic the manageable instructions below to password-protect zip file on Mac Terminal:
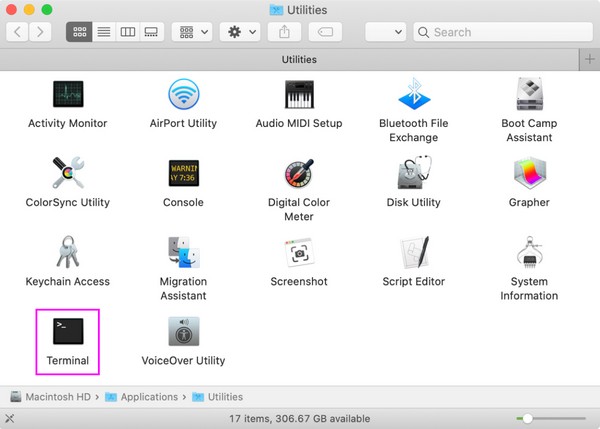
Step 1Open Terminal to display the command-line interface on your Mac. You can access it by heading to Finder and clicking the Applications folder. Once your Mac apps are displayed, open the Utilities folder, then double-click Terminal to enter the utility.
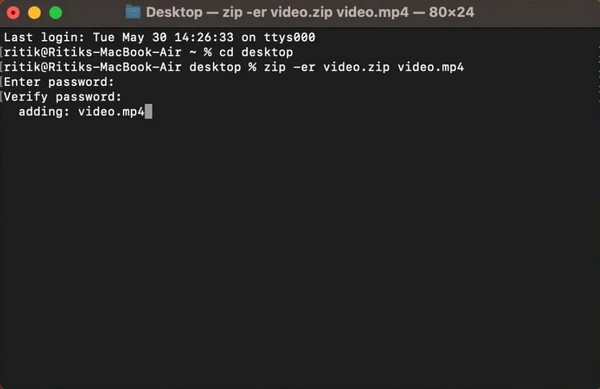
Step 2On its interface, type cd and the location path of the file you wish to zip with a password. For instance, type cd downloads if your file is saved in the Downloads folder. After that, press Enter, then type the zip -er filename.zip command.
Step 3The filename is the name of the file you will zip, along with its extension. Then, hit Enter again and enter the password you want to set for your file. Afterward, stand by until Terminal zips your file with a password.
Option 2. Password Protect Zip File on Mac with MacZip
Meanwhile, we understand if the Terminal is challenging to navigate since it can be technical. If this is the case, try the third-party tool MacZip instead. It was formerly known as eZip and supports numerous archive formats, including zip, rar, tar, and more. With this program, you can zip and protect your chosen files with a password efficiently for free.
Go with the simple directions underneath to password-protect a zip file Mac with the third-party tool, MacZip:
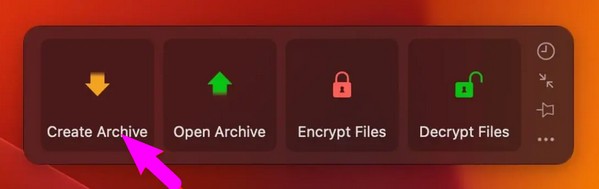
Step 1Download the MacZip file from its official site, and once downloaded, drag its icon into the Applications folder. After that, open the newly installed program and hit Create Archive on its prime interface. Next, select the file you will zip to import it into the interface.
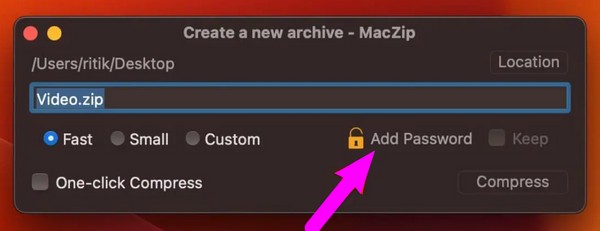
Step 2When a dialogue box emerges, click Add Password and enter the password you wish to set for your file. Next, click OK, then hit the Compress tab to create the encrypted zip file. When done, you will find it in one of your Finder folders.
Part 2. How to Unzip A File on Mac
Knowing how to protect your zip files with a password doesn’t mean you will also know how to unzip them. Hence, we included the FoneLab Mac Sweep program to help you unzip your files once you need to open them. Encrypting your files will surely protect them, but it will be a huge problem if you don’t know how to open them. Besides, FoneLab Mac Sweep offers more functions to help you handle your Mac further, and you will discover more about it later.
With FoneLab Mac Sweep, you will Clear system, email, photo, iTunes junk files to free up space on Mac.
- Manage similar photos and dulplicate files.
- Show you the detailed status of Mac with ease.
- Empty trash bin to get more storage.
Refer to the unchallenging steps below as a sample for unzipping after you zip file with password on Mac:
Step 1Come in for the FoneLab Mac Sweep Free Download tab on its official website to save the installer on your Mac. Once downloaded, drag it immediately to the Applications folder to launch and run the program afterward.
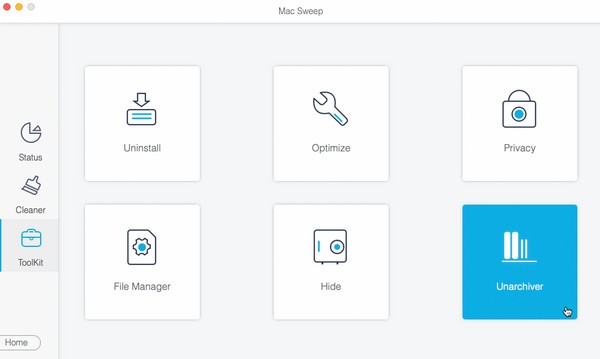
Step 2Choose the ToolKit box once its initial interface is exhibited on the screen. The other functions will then appear, so select Unarchiver on the next interface to view the unzipping feature.
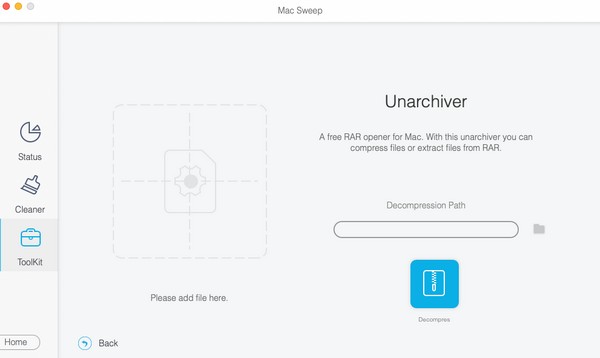
Step 3Locate the zip file on Finder, then drag and drop it into the interface’s box on the left portion. Lastly, click the Decompress button to unzip your Mac file successfully.
Part 3. How to Clean Mac with FoneLab Mac Sweep
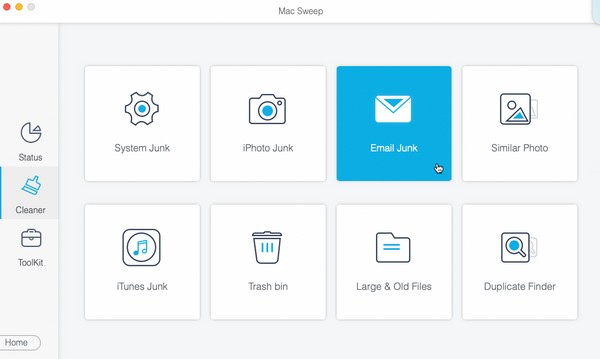
As mentioned previously, FoneLab Mac Sweep offers more functions, and among its popular features is the Cleaner, which provides various cleaning functions. For instance, its System Junk lets you erase your macOS unnecessary caches, logs, and more. Moreover, this program can eliminate other junk, such as Email Junk, iPhoto Junk, iTunes Junk, etc.
With FoneLab Mac Sweep, you will Clear system, email, photo, iTunes junk files to free up space on Mac.
- Manage similar photos and dulplicate files.
- Show you the detailed status of Mac with ease.
- Empty trash bin to get more storage.
Check the hassle-free procedure underneath as a model of cleaning your Mac with FoneLab Mac Sweep:
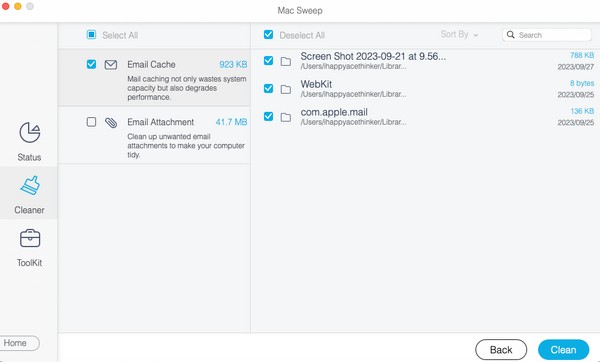
Step 1Return to the FoneLab Mac Sweep main interface since it’s already on your Mac. Then, select Cleaner and choose the data you plan to clean first, such as Email Junk, iPhoto Junk, Large and Old Data, iTunes Junk, System Junk, etc. Then, select Scan, followed by View when the program finishes browsing your chosen data.
Step 2Next, the tool will display your data on the last interface. Select the data categories in the left column or the specific files in the right, depending on what you want to clean or erase. Finally, hit the Clean tab to eliminate the files you selected from your Mac.
Part 4. FAQs about Password Protect Zip File on Mac
1. How do I restrict access to my folder on my Mac?
You can restrict the access to your Mac folders by encrypting them. Like the mentioned files in this article, you can also protect your folders with a password using different methods. Meanwhile, once you need to unzip them, you can also try this article's Part 2 method, FoneLab Mac Sweep, since it is reliable for unarchiving various zip files.
2. How do I password-protect a zip file on a Mac without Terminal?
The Terminal is the primary method for password-protecting a zip file, so it's understandable if you encounter difficulty finding other strategies besides it. Thankfully, you can check out the process we have discovered in Part 1 Option 2 as an alternative.
That's it for protecting your zip files using the effective methods on Mac. To find more solutions for Mac concerns like this, visit the FoneLab Mac Sweep site and explore its page.
With FoneLab Mac Sweep, you will Clear system, email, photo, iTunes junk files to free up space on Mac.
- Manage similar photos and dulplicate files.
- Show you the detailed status of Mac with ease.
- Empty trash bin to get more storage.