- Empty Trash
- Delete Mail App
- Clear Cache on Mac
- Get More Storage on Mac
- Make Chrome Use Less RAM
- Where is Disk Utility on Mac
- Check History on Mac
- Control + Alt + Delete on Mac
- Check Memory on Mac
- Check History on Mac
- Delete An App on Mac
- Clear Cache Chrome on Mac
- Check Storage on Mac
- Clear Browser Cache on Mac
- Delete Favorite on Mac
- Check RAM on Mac
- Delete Browsing History on Mac
Complete Guide About macOS Disk Utility Erase Failed
 Updated by Lisa Ou / Sept 05, 2023 09:15
Would you like to clean your macOS, but the Erase greyed out in Mac disk utility? Good news! This article has prepared the necessary information regarding this problem. Erasing a disk on the Disk Utility program is a process many users perform on their Mac computers. But like you, some people fail to do so, as they experience issues resulting from various situations. Thankfully, multiple solutions are also across websites online, so solving this problem now is quicker and easier since most are already tested and proven.
That said, allow this post to explain why the Erase feature fails when you use it on your macOS Disk Utility program. Some causes will be below so you can better understand the following solutions. Once you're informed about the possible causes of your disk deletion failure, the later parts will provide the proper methods for erasing on Disk Utility. As a bonus, we also incorporated a program to help clean your Mac. All these contain stress-free guidelines to help you with the processes.


Guide List
Part 1. Why macOS Disk Utility Erase Failed
Has the Erase greyed out in Mac Disk Utility program while you’re trying to delete a disk? Or has the deletion failed during the process? We can examine multiple possibilities for why you experience this on your Mac. And one of the situations we can look at is the presence of viruses or malware. Having them on your computer or any other device naturally causes your disk to be corrupted, making it unavailable to function. Hence, even a simple deletion process fails when you try it on the Disk Utility.
Meanwhile, you may have accidentally removed the disk while the erasing process is ongoing, leading to a failure. When erasing or using the disk on your device, you must ensure it is properly attached and be careful not to disconnect it to avoid interruption. On the other hand, the failure may also be caused by performing the wrong directions for erasing the disk on the macOS Utility Disk. Other causes besides these are also possible, but kindly try the following parts on your Mac for more details, regardless of the issue.

With FoneLab Mac Sweep, you will Clear system, email, photo, iTunes junk files to free up space on Mac.
- Manage similar photos and dulplicate files.
- Show you the detailed status of Mac with ease.
- Empty trash bin to get more storage.
Part 2. How to Erase on macOS Disk Utility
Before trying other deletion methods, you must perform the correct erasing instructions on macOS Disk Utility. As mentioned above, you may have only completed the incorrect instructions, making you unable to erase a disk on the Disk Utility. Hence, we included the proper procedure for using the Disk Utility, and this time, please ensure to follow the directions attentively. This way, you can successfully erase your Mac Disk on the Disk Utility program.
Act under the user-oriented guidelines below to determine the proper way to erase container disk on Mac Disk Utility program:
Step 1Focus on the bottom of your Mac desktop and hit the Launchpad icon once you see it on the Dock. When the installed apps appear, find the Disk Utility icon by sliding through the screen. You may also use the search field at the top if you can’t find it.
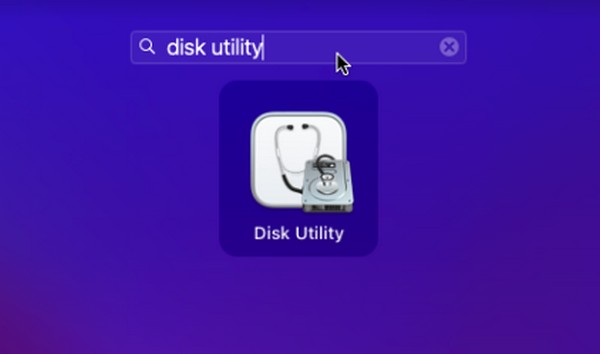
Step 2Alternatively, use the hand lens symbol at the top of your Mac screen to search and run the Disk Utility faster. When the program’s initial interface displays, you will see your Mac disks in the left panel, usually named Macintosh HD. Click it to view its information.
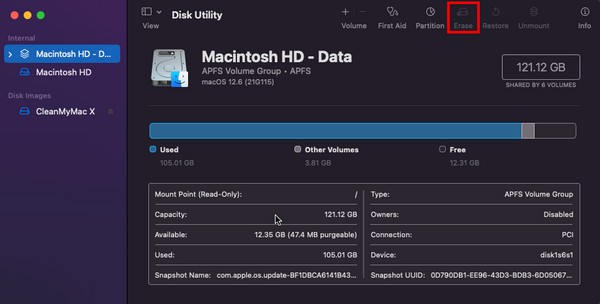
Step 3Click the Erase tab to start the deletion procedure on the uppermost section of the Disk Utility window. A dialogue box will then pop up, prompting you to choose the options for the erasing process. Choose accordingly to erase the disk successfully.
Part 3. How to Get More Storage on macOS with FoneLab Mac Sweep
If you want to get more storage on Mac by clearing Mac data, you can try FoneLab Mac Sweep. This tool is a cleaning tool that could fix multiple issues on a Mac. For instance, junk like caches, cookies, temp files, etc., contain viruses or malware, which cause the failure to erase a disk on your macOS. By erasing or cleaning these junks, the issues on your Mac could also be eliminated. Besides, you may no longer need the Disk Utility if you intend to free up space and clean your Mac since the FoneLab Mac Sweep is already enough to handle the cleaning process.
With FoneLab Mac Sweep, you will Clear system, email, photo, iTunes junk files to free up space on Mac.
- Manage similar photos and dulplicate files.
- Show you the detailed status of Mac with ease.
- Empty trash bin to get more storage.
See the straightforward procedure underneath as a model for cleaning your macOS with FoneLab Mac Sweep if you can't erase disk utility on Mac:
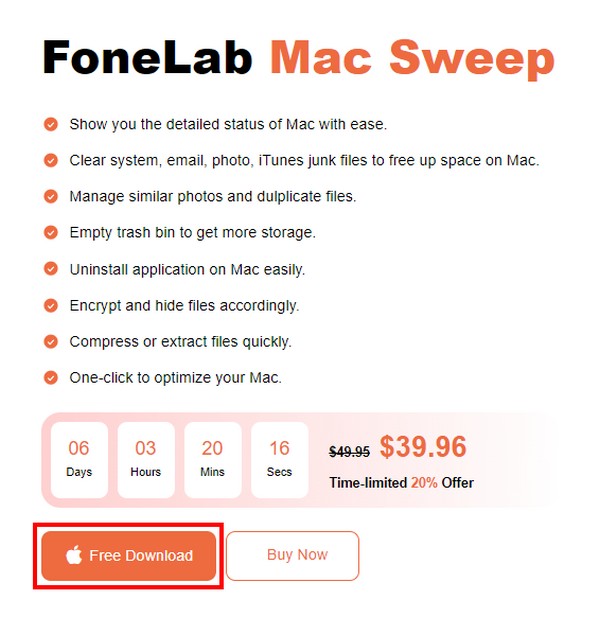
Step 1Access the FoneLab Mac Sweep site on Safari or any other browser on your Mac. On its web page, you will see its description on the left portion and the Free Download button with an Apple logo beneath it. Click it to acquire the installer file, and while the download is ongoing, check out its features’ description by browsing the entire page to discover more. Then, save it to the Applications folder and run the cleaner on your Mac.
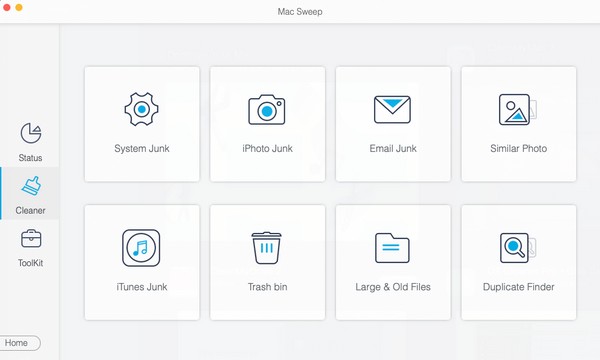
Step 2The tool will display its 3 key functions on the prime interface. Before proceeding to the erasing process, you can access the Status feature first to evaluate your disk information, such as the available and used space. Afterward, direct to the Cleaner interface, and the cleanable junk and other data on your Mac will display on the screen. Click the box of the data you’d like to erase first to move ahead.
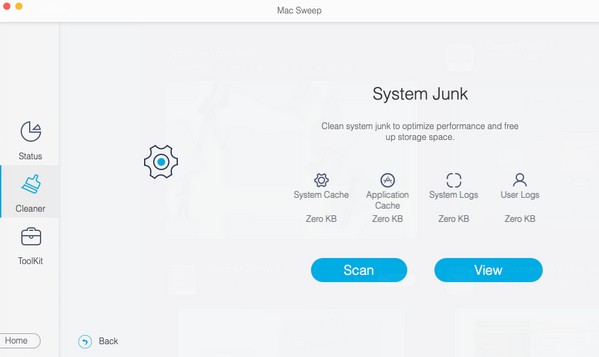
Step 3Expect your chosen data’s description to be revealed along with the Scan and View buttons on the following interface. Select Scan first for the program to browse your data, which usually lasts only a few seconds. When done, hit the View tab to display the found data on the following screen.
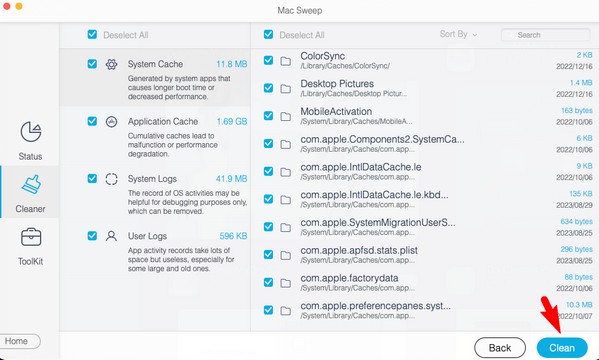
Step 4Next, tick the boxes of the data you’d like to erase to check them. Lastly, click Clean on the rightmost bottom of the interface to permanently remove them from your Mac disk. Once done, open the other boxes in the Cleaner section and apply the same process to delete the other junk or data types. You may also explore the ToolKit function and see its capabilities to help you with your Mac disk files.
Part 4. FAQs about macOS Disk Utility Erase Failed
1. What to do when the Disk Utility Erase feature fails?
You can use the First Aid feature if you encounter an issue or failure on your Mac Disk Utility. It is the troubleshooting method for fixing some malfunctions on the disk. On the other hand, try the recommended strategies above, especially the FoneLab Mac Sweep. A detailed explanation of how this program can help you is in Part 3, so check it out to overcome your Mac concern.
2. How do you force delete files that won't erase on a Mac?
If you're having difficulty erasing files on your Mac, install a professional tool like FoneLab Mac Sweep to help you. This program can directly erase the files you wish to eliminate using simple guidelines. Although it is a skilled worker, you won't have difficulty navigating the program since you only need basic knowledge to operate and understand how it works.
You now have the helpful and necessary information regarding the failed erasure on your macOS Disk Utility program there. If you need assistance with other device matters, share them below or access the FoneLab Mac Sweep page to see the solutions.
With FoneLab Mac Sweep, you will Clear system, email, photo, iTunes junk files to free up space on Mac.
- Manage similar photos and dulplicate files.
- Show you the detailed status of Mac with ease.
- Empty trash bin to get more storage.