- Empty Trash
- Delete Mail App
- Clear Cache on Mac
- Get More Storage on Mac
- Make Chrome Use Less RAM
- Where is Disk Utility on Mac
- Check History on Mac
- Control + Alt + Delete on Mac
- Check Memory on Mac
- Check History on Mac
- Delete An App on Mac
- Clear Cache Chrome on Mac
- Check Storage on Mac
- Clear Browser Cache on Mac
- Delete Favorite on Mac
- Check RAM on Mac
- Delete Browsing History on Mac
Top 10 Settings to Change on Your Mac for Security
 Updated by Lisa Ou / Oct 09, 2023 09:15
Have you received a macOS security alert on your Mac screen? If so, know that Apple has already cleared that most alerts you may receive on your Mac are fake. They appear when you accidentally enter a malicious website or click a suspicious pop-up online, so you must be careful in accessing unreliable sites on your browser. But if you're worried about harming your Mac or leaking your privacy due to such situations, let this article ease your concerns. Apple devices are known to be heavy in protecting their users' data and activities. Hence, you can use its securing functions and settings to protect your Mac and its data.
Below, we will introduce the best or 10 highly recommended settings to change to secure your Mac from harm. Whether you wish to protect its user access with passwords, Mac usage, or keep it from malicious sites, apps, etc., that may cause damage; this post will give you the accurate procedures to protect different aspects of your Mac. Proper descriptions and guidelines for each protection function will be ahead, so read every part attentively to avoid complications. Once finished with the article, we guarantee the security of your Mac.


Guide List
Part 1. 10 Settings to Change on Your Mac for Security
Among the settings you can modify on a Mac, here are the most recommended 10 to change first. Most of them only require a few clicks, so complete every method to secure your Mac quickly.

With FoneLab Mac Sweep, you will Clear system, email, photo, iTunes junk files to free up space on Mac.
- Manage similar photos and dulplicate files.
- Show you the detailed status of Mac with ease.
- Empty trash bin to get more storage.
Section 1. Change The Login Password
Changing the login password on a Mac is the most important thing to do when you first purchase it. Regardless of whether you bought it brand new or second-hand, you must set a password that will keep it safe from the prying eyes of other people. Also, it’s preferable to choose a password containing various letters, symbols, and numbers for better security.
Abide by the simple procedure below to change the login password and avoid a macOS security alert:
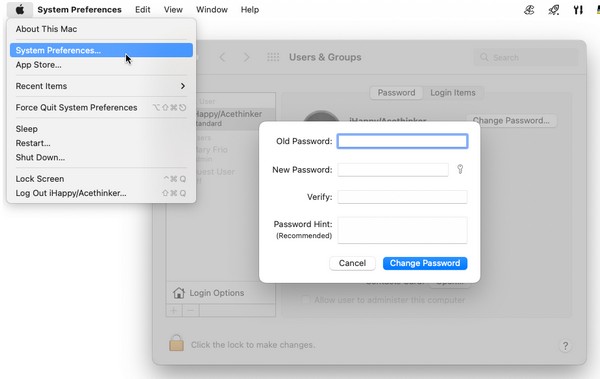
Step 1Hit the Apple symbol to view its menu at the top desktop and click System Preferences. On the appearing window, select the Users & Groups icon.
Step 2Click the Change Password aligned with your user account on the right section of the window. When a dialogue box pops up, enter the requirements in the fields to change your login password.
Section 2. Lock Your Mac When it's Idle
Whenever your Mac is idle or not in use, lock it, especially if you need to step outside. Other people may see it and invade your privacy while you’re not around. They may also click on some options that could change how your Mac works. Hence, lock it as much as possible, as many situations can occur once you leave it idle. After all, locking it will also save its battery from draining too fast.
Act under the trouble-free steps underneath to lock your Mac when it’s idle:
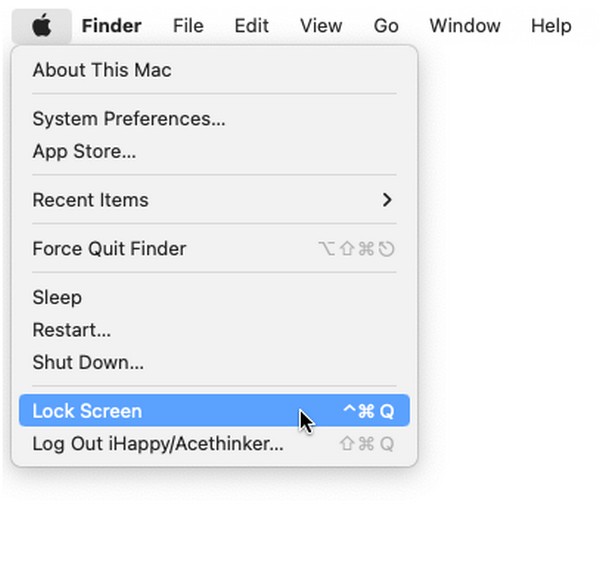
Step 1Click the Apple symbol at your desktop’s uppermost left portion.
Step 2Once the menu list is revealed, select Lock Screen near the bottom to lock it.
Section 3. Show Message When Screen is Locked
Meanwhile, you can leave a message on the locked screen if someone tries unlocking it. For instance, a contact number will greatly help if you have misplaced your Mac or MacBook so that the person who found it can communicate with you. You may also show the required information for entering the guest account if you plan to lend your Mac to someone while away.
Conform to the effortless process beneath to show a message when the screen is locked and prevent a MacBook security error:
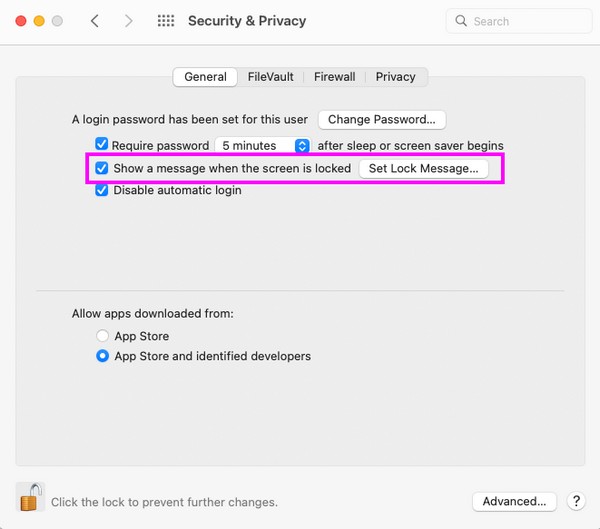
Step 1Choose the Apple icon, then hit System Preferences. Afterward, select Security & Privacy and proceed to the General section.
Step 2Hit the lock icon at the bottom and enter the administrator requirements to be allowed to set a message. Once qualified, check Show a message when the screen is locked. Then, click the Set Lock Message tab and enter the message you like.
With FoneLab Mac Sweep, you will Clear system, email, photo, iTunes junk files to free up space on Mac.
- Manage similar photos and dulplicate files.
- Show you the detailed status of Mac with ease.
- Empty trash bin to get more storage.
Section 4. Allowing Only Apps from The App Store or Approved Developers
If you often install apps regardless of where they came from, activate the option on Settings that enables you to install only apps from the App Store and approved developers. This way, malicious apps will be blocked from entering your Mac. It is a helpful function to prevent your Mac from installing apps automatically downloading from the web when you click on a suspicious link. Thus, all the apps that get into your Mac will be secure and trustworthy.
Be guided by the easy instructions below to allow only apps from Apple and approved developers:
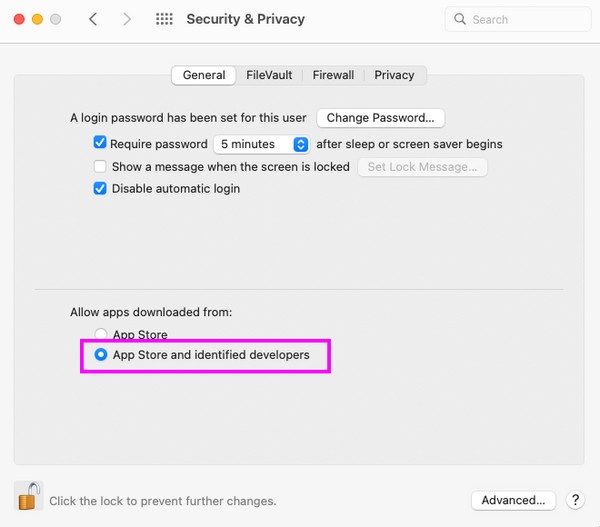
Step 1Open the System Preferences window using the Apple menu icon. Once it’s displayed, Security & Privacy > General and handle the lock icon for authentication.
Step 2On the lower portion of the window, choose App Store and identified developers on the Allow apps downloaded from: section to finish the procedure.
Section 5. Enable Find My Mac
Find My Mac is a feature mainly used for locating the device. Set it up so you can quickly find your Mac if it gets lost or stolen. Besides, it provides options for processing other activities, including locking and erasing the Mac. Hence, Find My Mac has triple advantages once you set up the feature. It also only requires your Apple ID and password to utilize it on iCloud.
Stick to the straightforward directions underneath to enable Find My Mac and avoid a macOS security alert:
Step 1Pick Apple menu > Preferences on your Mac and click the Apple ID on the displayed window. On the following screen, click iCloud and use your Apple ID to log in.
Step 2After that, select Find My Mac, then set up the feature with the prompted options to enable it on your Mac.

Section 6. Automatically Logging Out After Periods of Inactivity and Restricting Access to System-wide Preferences
Meanwhile, having your user account automatically logged out after periods of inactivity is also recommended. Accessing the Settings & Privacy window will let you set the Mac to log out automatically after your indicated minutes of inactivity. Aside from that, you can also set the restriction to access system-wide preferences by requiring the administrator password. Setting up these features will protect your Mac from intruders who try to set up significant changes on the Mac.
Bear in mind the unchallenging guidelines below to log out of your Mac automatically after periods of inactivity:
Step 1Click System Preferences on the Apple menu, and select Security & Privacy from the available icons. Afterward, ensure you are in the General section and click the lock icon to be allowed to make changes.
Step 2Once unlocked, click the Advanced tab and set up the Log out after (your preferred number of) minutes of inactivity option. Then, check the following option to complete the process.

Section 7. Encrypt Files on Mac
When it comes to your data, you can protect them as well by encrypting the files on your Mac. Encryption is a way to lock your chosen files and set up a password to prevent unauthorized access. This way, only you or the people you have given the code to will have the capability to view or open the files you wish to protect.
Imitate the convenient operation below to encrypt files on Mac and prevent a MacBook security error:
Step 1Enter the Finder window on your Mac and choose the items you wish to encrypt.
Step 2Afterward, control-click, then select Encrypt [item name] from the pop-up menu. When prompted, set the password you wish to protect the file with.

Section 8. Turn On Firewall
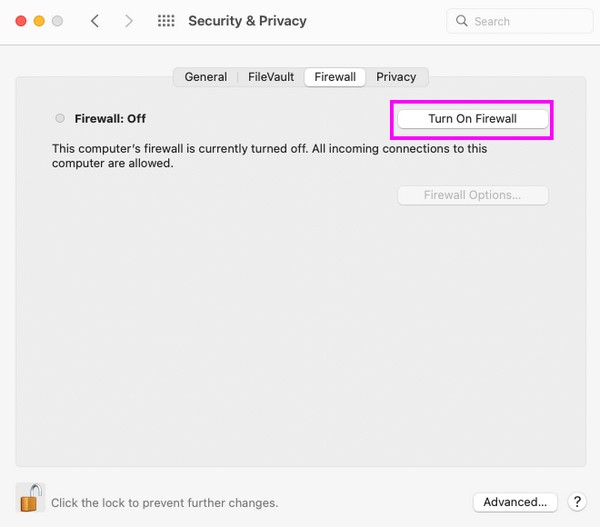
The firewall built-in protection feature on macOS shields the computer from denial-of-service attacks and network access. Once you configure it on your Mac System Preferences, it will block the unwanted incoming connections from other devices. Doing this will give your Mac a more secure defense against network threats.
Mirror the worry-free procedure underneath to turn on Firewall on Mac:
Step 1Select Apple menu > Preferences > Security & Privacy on your Mac desktop. Next, hit the Firewall tab on the upper section of the window.
Step 2Manage the lock icon on the lowermost left to be permitted to make changes, then hit the Turn On Firewall tab to turn it on.
Section 9. Prevent Downloaded Files from Automatically Opening
You must know the files you download from the web are not always safe. Thus, when they automatically open after downloading, they could sneak in malicious items you may accidentally click. After that, the suspicious item will be stored on your Mac and may cause damage. It could especially infect your other Mac data if it is a virus or malware.
Follow the comfortable guides below to prevent downloaded files from automatically opening to avoid macOS security alert:
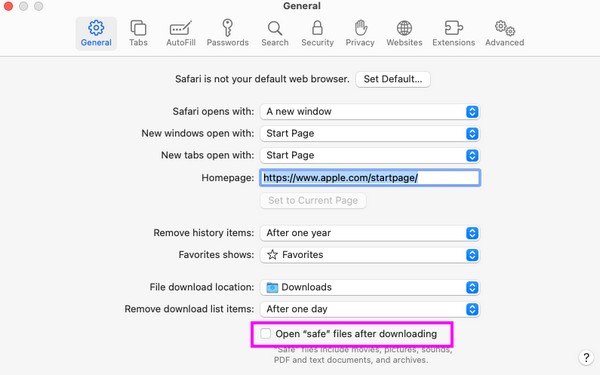
Step 1Run the Safari app and click Safari > Preferences on the menu bar. On the window that will open on the screen, proceed to the General section.
Step 2You will see the Open “safe” files after downloading option at the bottom, so if it is activated, untick its checkbox to prevent the files from opening automatically.
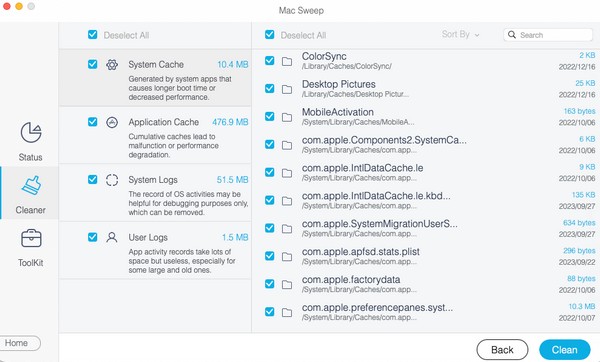
Section 10. Clear Cache and Cookies with FoneLab Mac Sweep
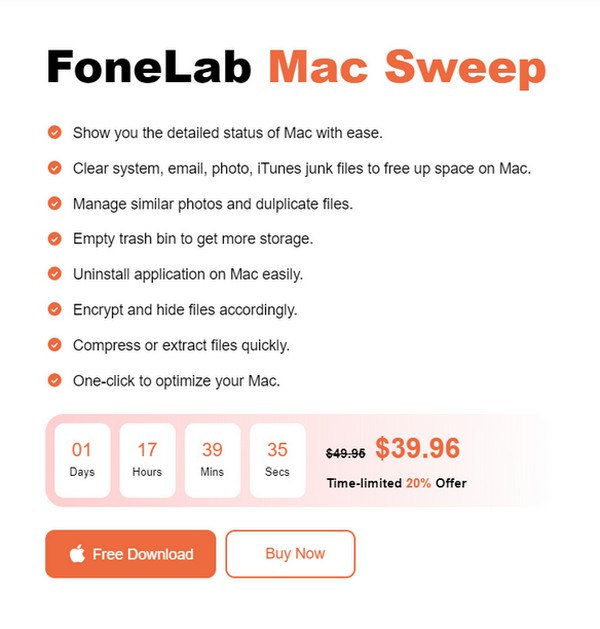
Another way to keep your Mac secure is by keeping it clean of junk and useless data like cache and cookies. Hence, here’s FoneLab Mac Sweep to help you handle that. This cleaning program is often used as a reliable method for cleaning various data types on Mac. With its System Junk feature, caches, cookies, and other junk will immediately disappear from your Mac. Besides, you will also find its other features beneficial since it doesn’t only support junk files. It also lets you erase unwanted or unnecessary data, like large and old files, browser data, trash, duplicated images, and more.
With FoneLab Mac Sweep, you will Clear system, email, photo, iTunes junk files to free up space on Mac.
- Manage similar photos and dulplicate files.
- Show you the detailed status of Mac with ease.
- Empty trash bin to get more storage.
Take the hassle-free sample steps underneath to clear cache and cookies with FoneLab Mac Sweep:
Step 1Download FoneLab Mac Sweep using the orange Free Download tab on the page. Once saved, move it inside the Applications folder and open the program.
Step 2Click Cleaner in the main interface’s middle section and select System Junk on the next screen. Following that, click Scan > View accordingly to proceed.
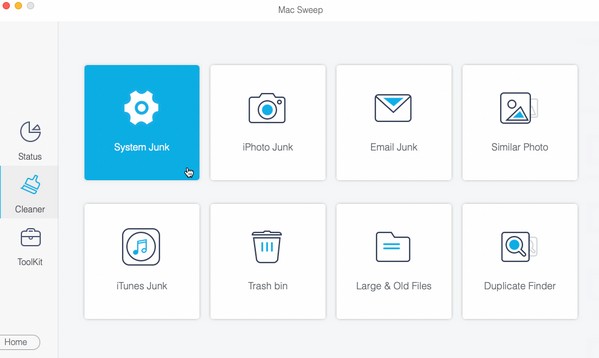
Step 3Select all the items on the last interface once your Mac junk, including caches and cookies, are displayed. Finally, press Clean to clear them from your Mac.
With FoneLab Mac Sweep, you will Clear system, email, photo, iTunes junk files to free up space on Mac.
- Manage similar photos and dulplicate files.
- Show you the detailed status of Mac with ease.
- Empty trash bin to get more storage.
Part 2. FAQs about Settings to Change on Your Mac for Security
1. What security settings should I set up on my Mac?
Putting a password is the most important security setting you must set up, as it's your primary defense against unauthorized access. But the settings in the article above are also highly suggested to give your Mac better security.
2. Do I have to update my Mac Security?
It's not a requirement, but we suggest you update your Mac Security, as it's also a great way to prevent your Mac from experiencing harm.
If you operate all the suggested settings in this article, the security of your Mac will be guaranteed, letting you have an untroubling Mac experience.
With FoneLab Mac Sweep, you will Clear system, email, photo, iTunes junk files to free up space on Mac.
- Manage similar photos and dulplicate files.
- Show you the detailed status of Mac with ease.
- Empty trash bin to get more storage.