Recover the lost/deleted iPhone data including photos, contacts, videos, files, call log and more data from your SD card or device.
Root Your Android Phone with Ease Using Root Genius
 Updated by Lisa Ou / April 20, 2023 09:00
Rooting an Android phone can give users a wide range of customization options and allow them to take full control of their device's software and system settings. One of the popular rooting tools is Root Genius, which provides a simple and easy way to root an Android phone. In this article, we will discuss how to root your Android phone using Root Genius on both phone and computer in detail.


Guide List
Part 1. A Brief Overview of Android Rooting
Android rooting is the process of gaining administrative access to your Android device. This allows you to have full control over your device's software and system settings, which is otherwise limited by the manufacturer. Rooting can provide a lot of benefits, such as customizing the device, removing pre-installed apps, installing custom ROMs, and improving performance. However, rooting your device comes with risks, such as voiding your warranty, security vulnerabilities, and potentially damaging the device.
Part 2. Necessary Preparations Prior to Rooting Your Android Device
Before rooting your device, it is important to prepare and take necessary precautions. Firstly, ensure that you have backed up all your important data, such as photos, videos, documents, and contacts. This will help you to restore your data if anything goes wrong during the rooting process. Next, make sure that your device is fully charged or has at least 50% battery life, as the rooting process can drain the battery quickly. Also, it is recommended to disable any security software or antivirus apps that could interfere with the rooting process.
Part 3. Rooting Your Android Phone Using Root Genius
Rooting Your Android Phone Using Root Genius on Phone
Step 1Download Root Genius APK
The first step is to download Root Genius APK from a reliable source, as it is not available on the Google Play Store. You can download it from the official website or other trustworthy third-party websites.
Step 2Install Root Genius APK
Once you have downloaded the Root Genius APK file, go to your phone's Settings and then Security. Enable Unknown Sources to allow installation of apps from sources other than the Google Play Store. Next, locate the Root Genius APK file on your phone and install it.
Step 3Launch Root Genius
After installing the Root Genius APK, launch the app from your phone's app drawer.
Step 4Start the Rooting Process
Connect your phone to the internet and click on the Root Now button on the Root Genius app. The app will then start rooting your phone automatically. Make sure that your phone has a stable internet connection during the rooting process.
Step 5Wait for the Rooting Process to Complete
Rooting your phone may take a few minutes, and during this time, it is important not to disconnect your phone from the internet or interrupt the process. Once the process is complete, you will see a message on the screen that says Root Success.
Step 6Reboot Your Phone
After the rooting process is complete, reboot your phone, and you will have successfully rooted your Android phone using Root Genius.
Rooting Your Android Phone Using Root Genius on Computer
Step 1Download and Install Root Genius
The first step in rooting your Android phone using Root Genius on a computer is to download and install the software. You can download Root Genius from the official website or other trustworthy third-party websites.
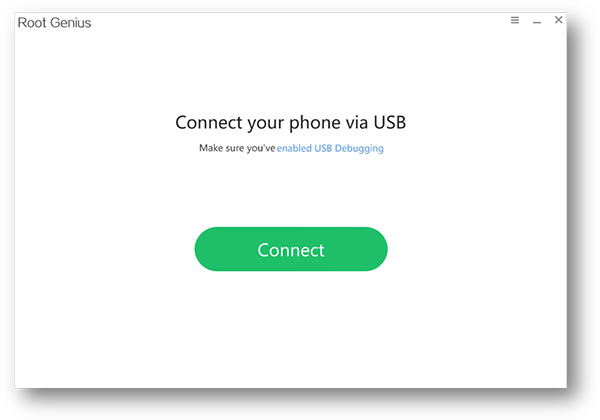
Step 2Connect Your Phone to the Computer
After downloading and installing Root Genius, connect your phone to the computer using a USB cable. Make sure that USB debugging is enabled on your phone by going to Settings > Developer options > USB debugging.
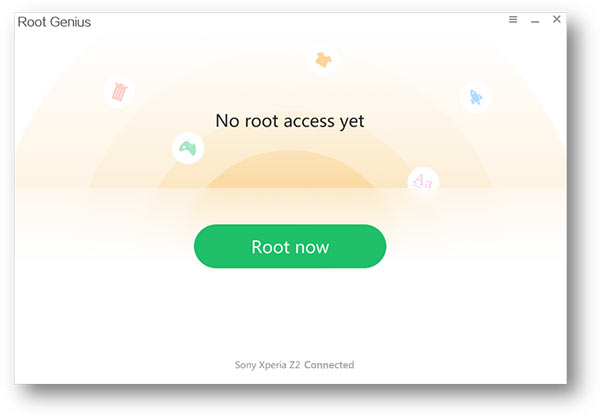
Step 3Launch Root Genius
Launch Root Genius on your computer, and it will detect your phone automatically.
Step 4Start the Rooting Process
Click on the Root Now button on the Root Genius software, and it will start rooting your Android phone.
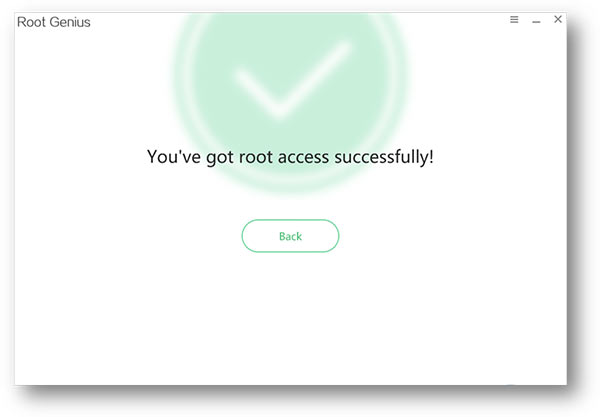
Step 5Wait for the Rooting Process to Complete
During the rooting process, do not disconnect your phone from the computer or interrupt the process. Once the process is complete, Root Genius will show a message on the screen that says Root Success.
Step 6Reboot Your Phone
After the rooting process is complete, reboot your phone, and you will have successfully rooted your Android phone using Root Genius on a computer.
Part 4. Rooting Your Android Phone with Root Genius on a Mac
Rooting your Android device with Root Genius on a Mac is also possible. However, you will need to use a virtual machine software like VirtualBox or Parallels to run a Windows operating system on your Mac. Once you have set up a virtual machine, follow the same steps as in Part 3 to root your Android device using Root Genius.
Rooting an Android phone using Root Genius is a simple and easy process that provides users with a wide range of customization options. By following the steps outlined above, you can root your Android phone using Root Genius on both your phone and computer. However, it is important to note that rooting your Android phone comes with risks and can void your warranty. Therefore, it is important to proceed with caution and at your own risk.