FoneEraser for iOS FAQ
Do you have questions about FoneEraser for iOS? Find answers as below:
Q1. iOS device cannot be detected by the program?
Step 1. In this case, check whether you have installed the latest version of iTunes or not. For Windows users, you can download the newest iTunes on www.apple.com/itunes/ and for Mac users, please make sure that iTunes on your Mac has been initialized.
Step 2. Try another USB cable to reconnect your iOS device. Make sure that your device is not in recovery or DFU mode. If this doesn't help, please contact our support team: support@fonelab.com.
Q2. Can the program erase the locked iOS device?
If you has been locked out of your iOS device for some reasons, the device can not be connected to the computer successfully. So the program will not recognize your device neither. You have to unlock your iOS device first so that FoneEraser for iOS can detect your device and erase your iOS data successfully.
Q3. Will the iOS device data be erased when the device fails to get started?
There are two possible reasons that your iOS device fails to get started. Hardware issue or system failure. Have your device repaired if for hardware issue. Restore your iOS device and then use FoneEraser for iOS to help you erase the data on your iOS device.
Q4. What devices does FoneEraser for iOS support?
The supported iOS devices included: iPhone: iPhone 4, iPhone 4S,iPhone 5, iPhone 5C, iPhone 5S, iPhone 6, iPhone 6 Plus, iPhone 6s, iPhone 6s Plus, iPhone SE, iPhone 7, iPhone 7 Plus. iPad: iPad Pro, iPad Air2, iPad Air, iPad 2, iPad 3rd generation, iPad 4th generation, iPad mini 2, iPad mini 3, iPad mini 4. iPod: iPod touch 4th generation, iPod touch 5th generation, iPod touch 6th generation. Supported versions: iOS 5 to iOS 10.2.1.
Q5. Can FoneEraser for iOS erase data from a jail-broken iOS device?
Of course yes, this software fully supports erasing data from jail-broken iOS devices. Kindly note that the device will stay in jail-broken status after erasing data with this software.
Q6. Is it necessary to install iTunes when I use FoneEraser for iOS?
To ensure the program can detect your iOS device, we recommend you to install iTunes. This FoneEraser for iOS is well compatible with the latest version of iTunes. If you haven't installed iTunes on your computer, please visit www.apple.com/itunes/ to download and install it onto your computer.
Q7. What are the main differences among the three erasing levels?
Low(Erase One Time): FoneEraser for iOS will overwrite all the data on device with zero files to ensure the files cannot be recovered. Medium(Erase Two Times): FoneEraser for iOS will overwrite all the data on device with zero and junk files to ensure the files cannot be recovered. High(Erase Three Times): We recommend you to select this option if you have saved all data on your device. The security standard is based on the U.S DoD 5220.22-M.
Q8. Erasing process stops after the software reminds you "Encrypted backup files"?
If you have encrypted your iTunes backup, you will get stuck in the middle of the erasing process when using FoneEraser for iOS to clean up your device. Don't worry, read how to remove protection of encrypted iTunes Backups to solve it.
Steps for Getting Started with FoneEraser for iOS
Please be aware that this software will wipe out all contents and settings at a time, you'd better back up your important data in advance.
Step 1. Free download and install FoneEraser for iOS onto your computer and then it will launch automatically once it is finished.
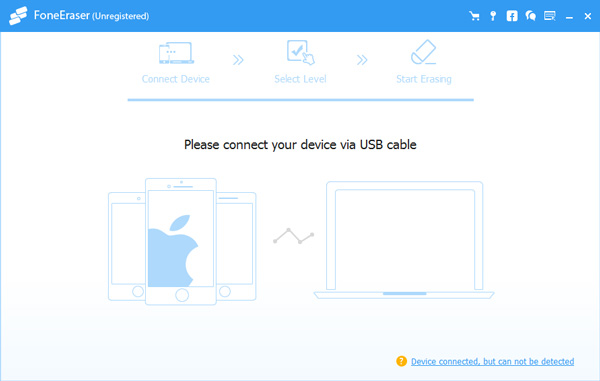
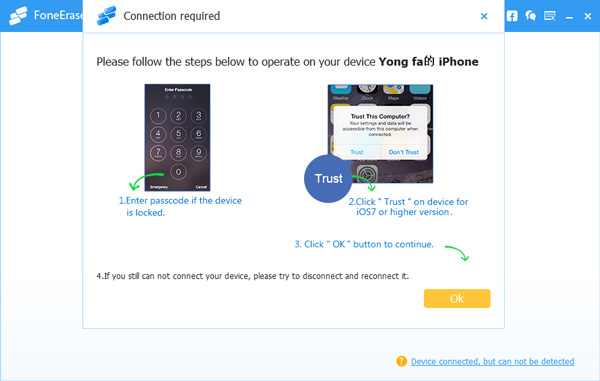
Step 2. Plug your iOS device to the computer via USB cable, and enter passcode on your phone if it is locked. Tab Trust on device for iOS 7 or higher versions.
Step 3. The software will soon detect your device, if not, click the icon right behind Failed. Please make sure that you have installed the latest version of iTunes on your computer.
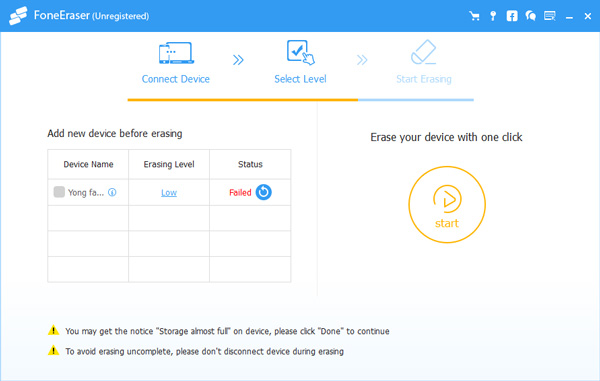
Step 4. Select an erasing level (Low, Medium or High). High Level is recommended here. You can also make general settings for your preference. For example, set local path and format for saving exported erasing history, CSV and PDF. Besides, you can make update settings automatically.

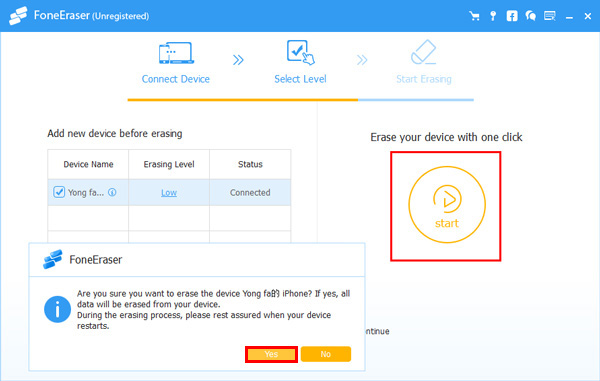
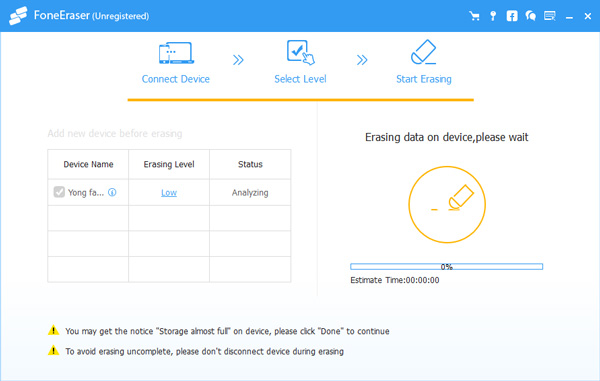
Step 5: After your device is connected successfully, click the Start button to begin erasing and then click Yes to confirm the procedure.
Step 6: Wait for the erasing process to complete.
That's all. You have finished erasing everything on your iOS devices. If you still have doubt that whether the devise is erased thoroughly and permanently or not, you can use some iOS data recovery tool to have a test.