Activating Your Software
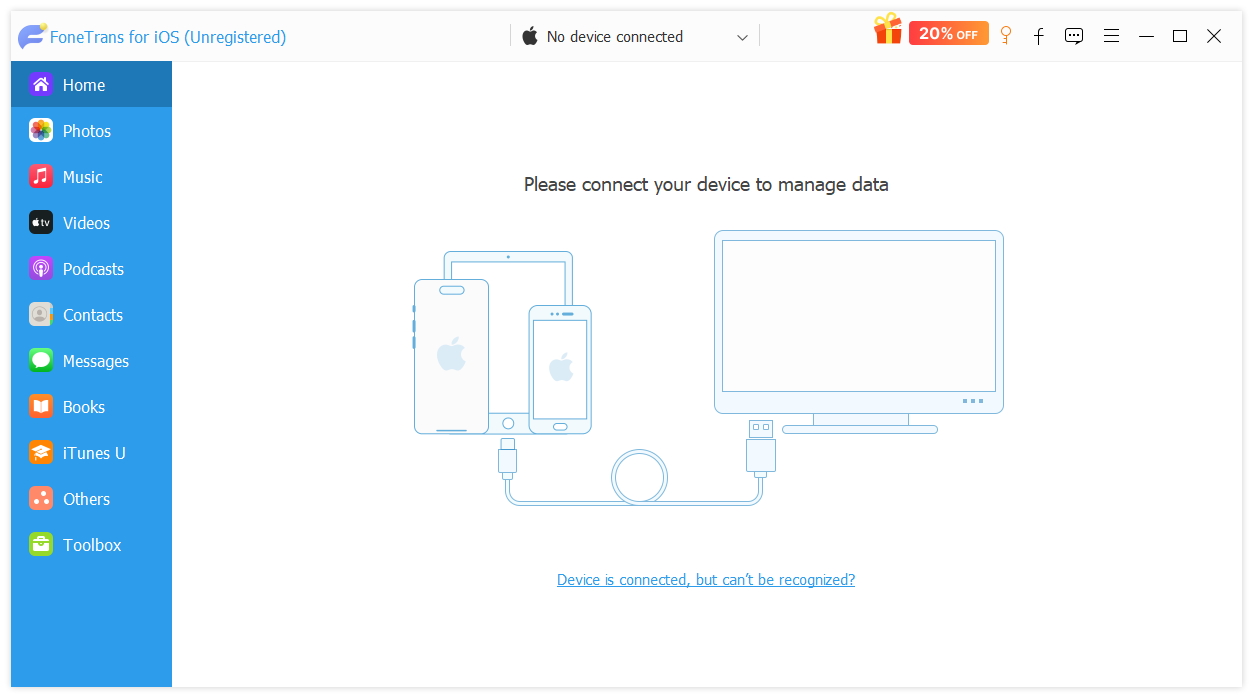
1Click the Key icon on the top-right corner.
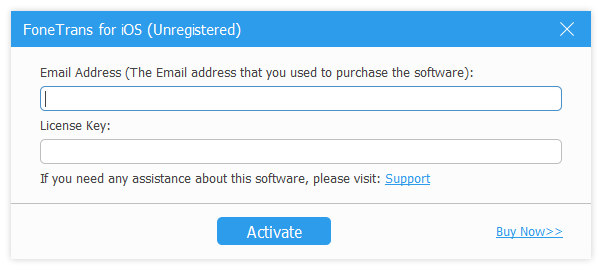
2Enter the email and register code in the box.
Warm Tips
1Starting with iOS 13 and above, Apple has strengthened data security protections for iOS devices. When using this software to scan and access data on your iOS device, a pop-up will appear asking you to enter your iPhone passcode for verification. Please note that you may be prompted to enter your passcode twice during the scanning process.
2If you have previously created an encrypted backup of your iOS device via iTunes, you will need to enter the iTunes backup password in this software to unlock it. Additionally, you will be required to confirm the action by entering your iPhone passcode on the device itself.
Tutorial
Transfer Photos
1Add photos to device
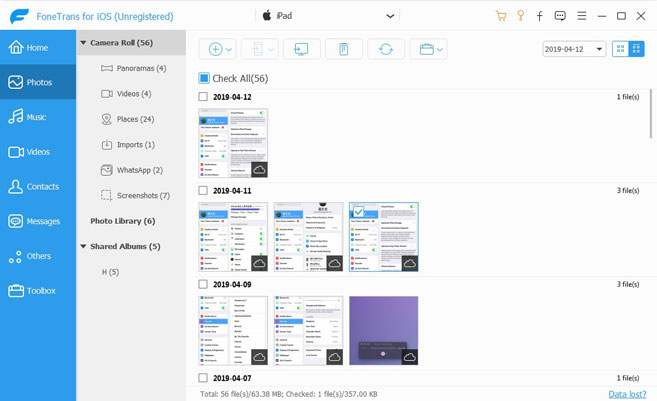
Select Photos tab from the left panel and begin scanning. It will finish in minutes depends on your data size. click the first plus icon on the main interface and open the local folder and select the items.
2Transfer photos to another device
Connect 2 devices with USB cable. Choose photos from the interface and click the device icon on the top of the interface.
3Transfer photos to computer
If you want to transfer photos to computer from your device, choose them from the results and click the computer icon on the top.
4Delete photos
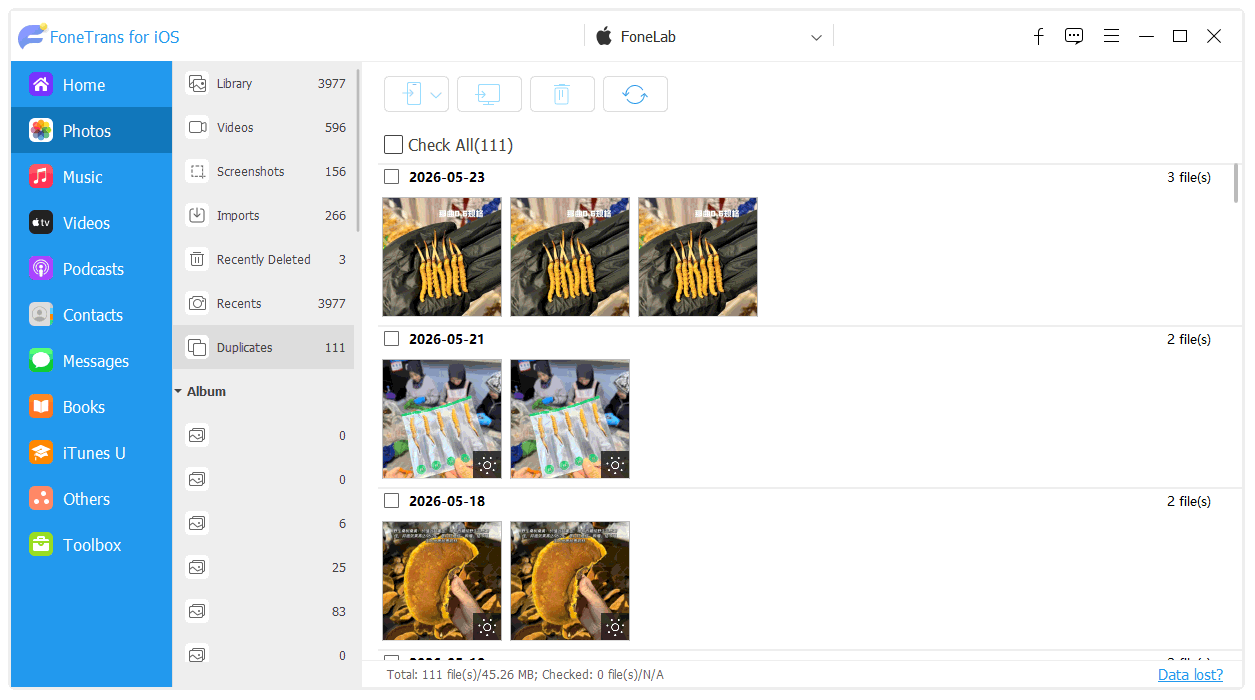
Choose your desired photos, you can choose Duplicates tab if you want to remove the repeated ones. Check the boxes and click delete icon on the top.
5Manage albums
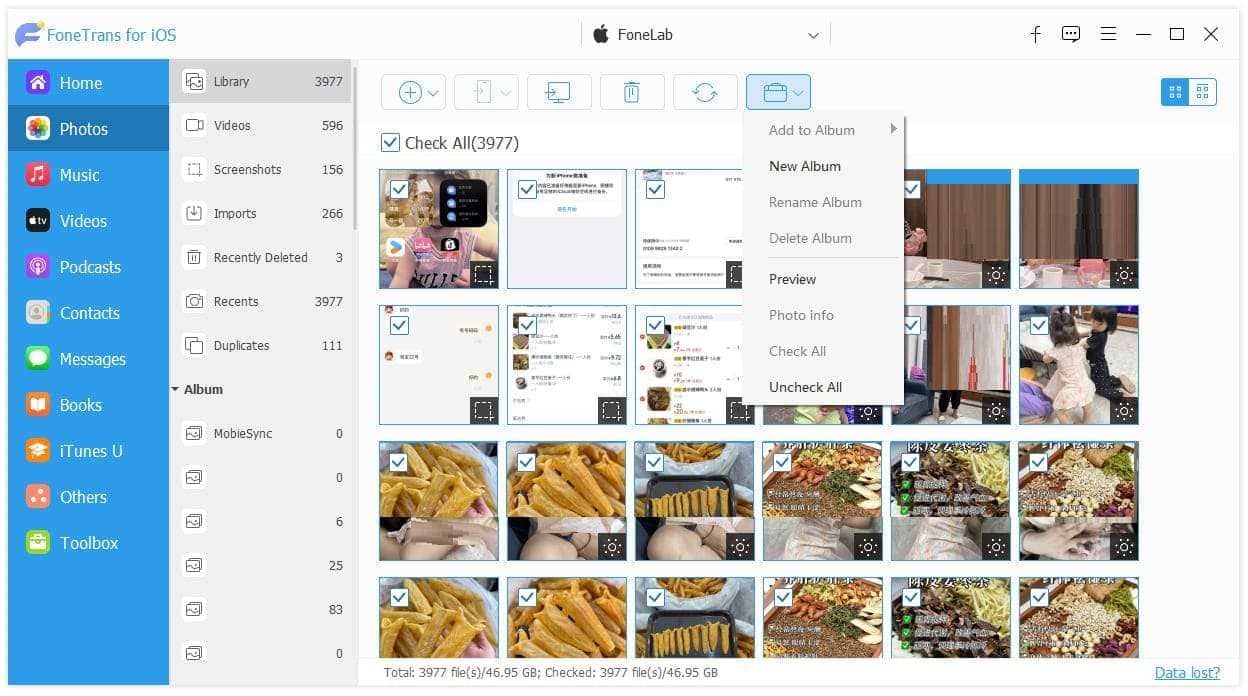
Add to Album: To move photos to album, choose them on the right and click the more icon. Choose Add to Album.
New Album: You can create a new album accordingly.
Rename Album: Choose an album and choose Rename Album.
Delete Album: Select albums from the left panel and click Delete Album.
Transfer Music
1Add music/ringtone to device
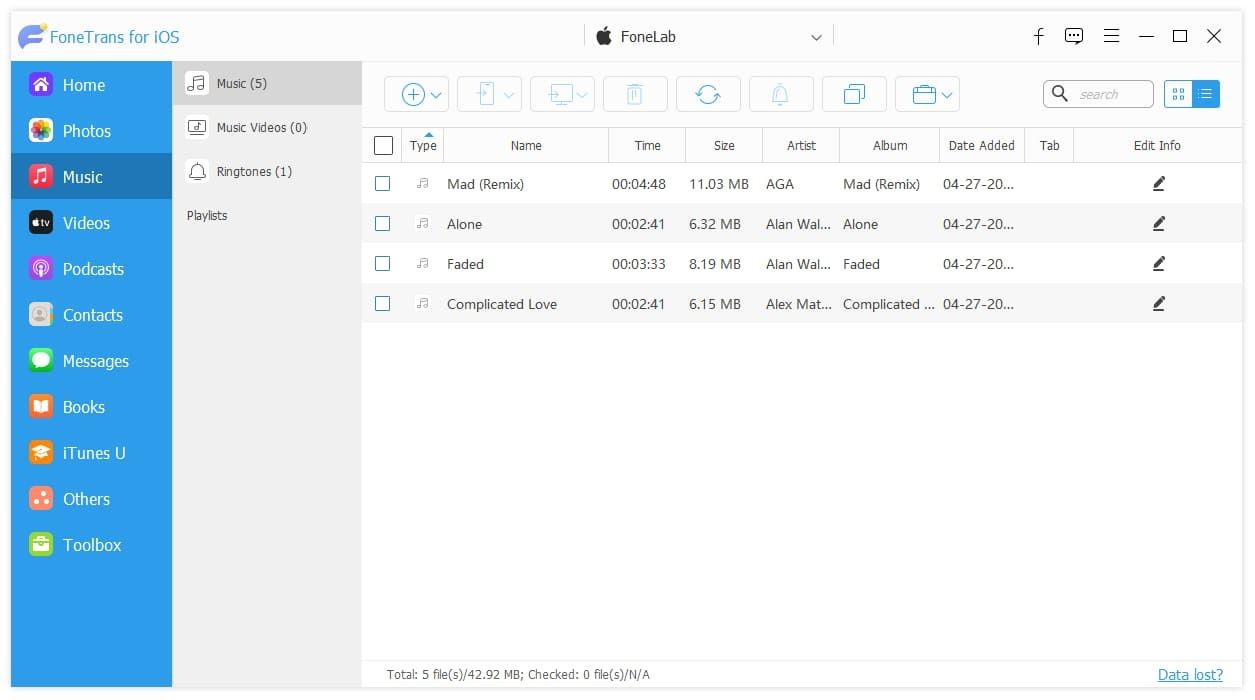
Select Music on the left side, click the plus icon and choose your music files. If you want to add ringtones, choose Ringtone first.
2Transfer music/ringtone to another device
Choose your music files and click the device icon on the top. Choose your device from the list.
3Move music/ringtone to PC/iTunes
Select your files and choose the computer icon. Select Export to PC or Export to iTunes.
4Delete music/ringtone to device
Select your music files and then click the delete icon.
5Make music to ringtone
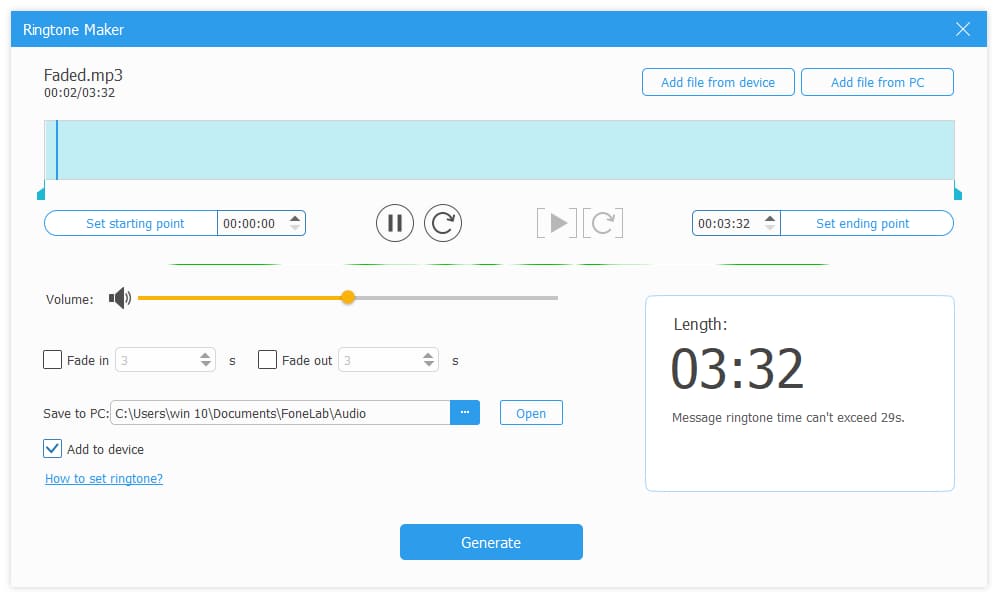
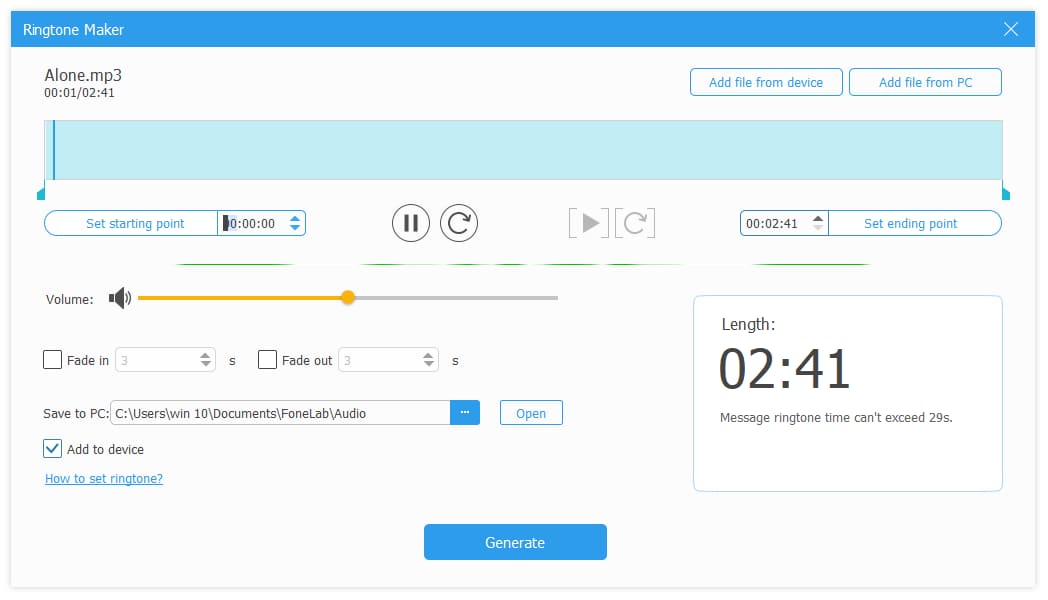
Select a music file from the results, click the ringtone icon. On the pop-up window, Choose the Start and End point. You can listen and adjust it according. Finally, confirm the destination and click Generate button.
6Media Info
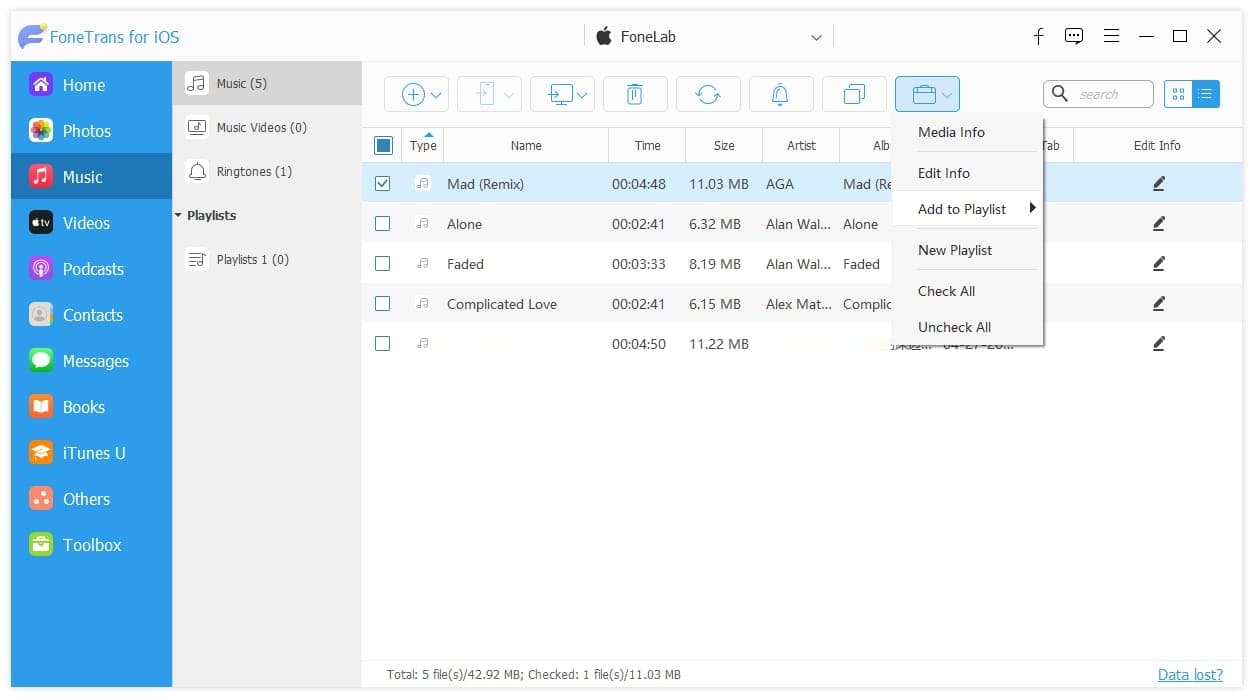
Select more icon on the top and choose Edit Info. Then you can view and click the edit icon to modify them accordingly.
7Playlist Management
Select a music file then click the more icon and choose Add Playlist. And you can choose New Playlist to create a new one.
Transfer Videos
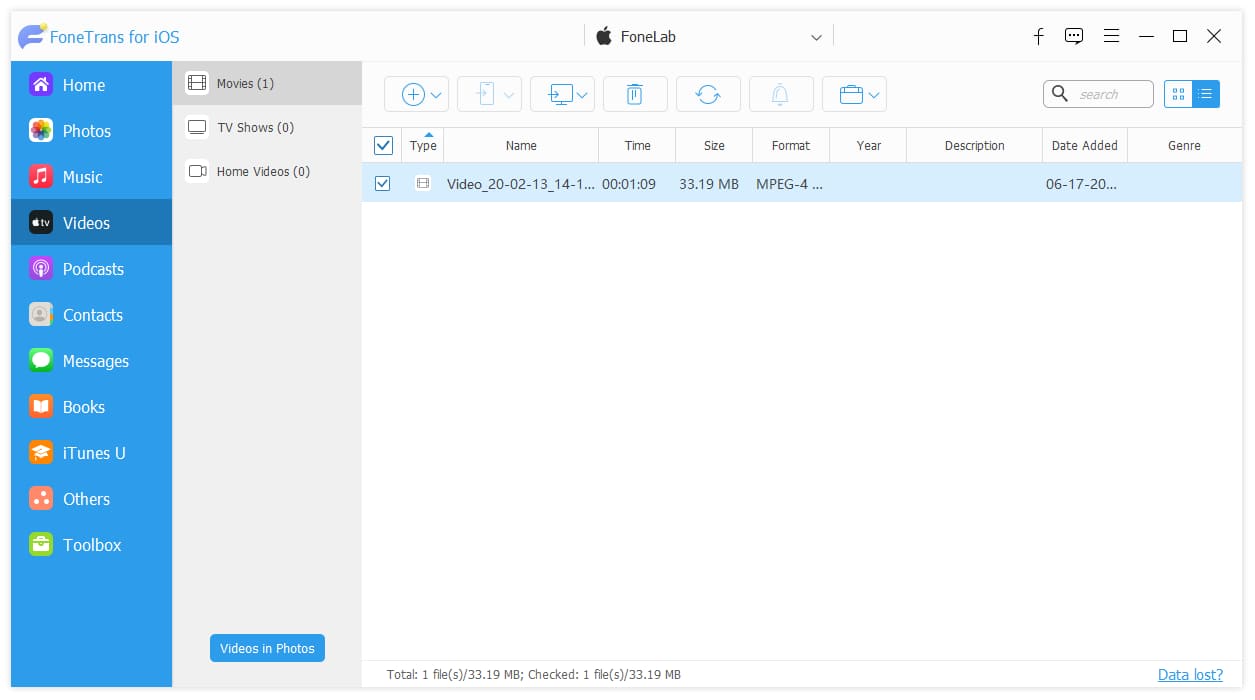
1Add videos to device
Select Videos on the left side, click the plus icon and choose your video files. It will convert the videos to the compatible format for your device automatically.
2Transfer videos to another device
Choose your desired files and click the device icon on the top. Choose your device from the list.
3Move videos to PC/iTunes
Select your files and choose the computer icon. Select Export to PC or Export to iTunes.
4Delete videos to device
Select your video files and then click the delete icon.
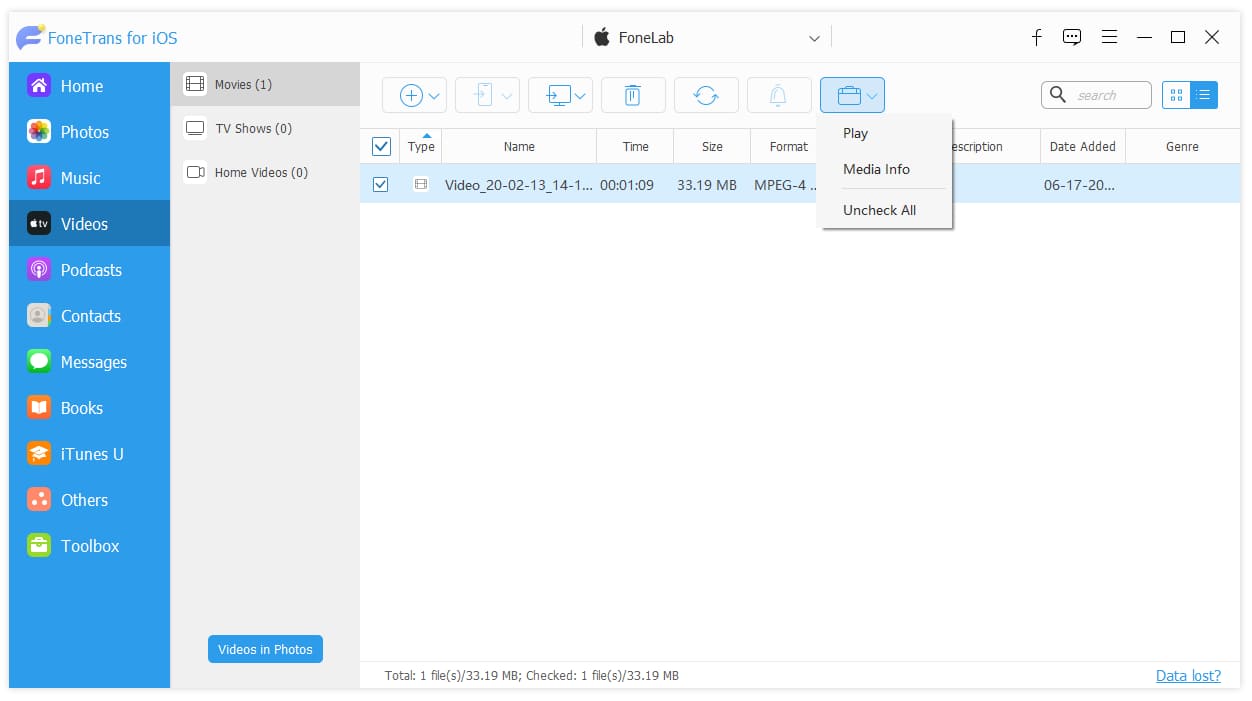
5Play videos
Select your video file, click more icon and choose Play.
6Media Info
Select more icon on the top and choose Media Info.
Transfer Podcasts
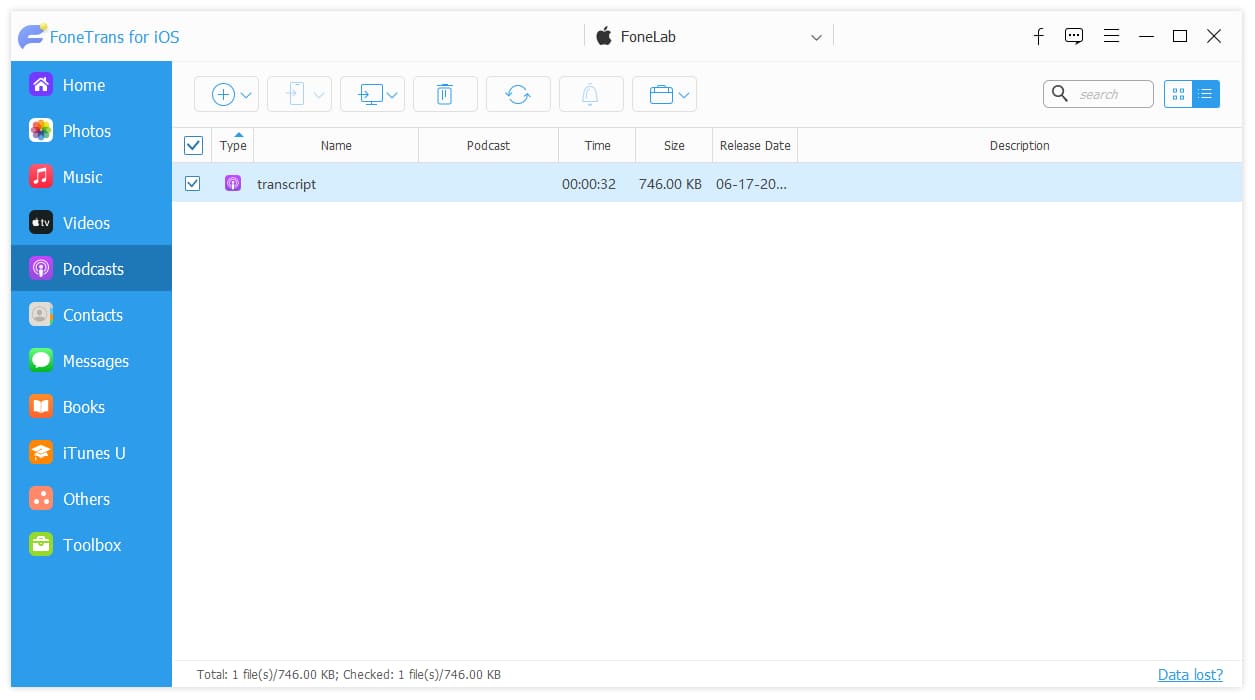
1Add podcasts to device
Select Podcasts on the left side, click the plus icon and choose your podcast files.
2Transfer podcasts to another device
Choose your desired files and click the device icon on the top. Choose your device from the list.
3Move podcasts to PC/iTunes
Select your files and choose the computer icon. Select Export to PC or Export to iTunes.
4Delete podcasts
Select your podcast files and then click the delete icon.
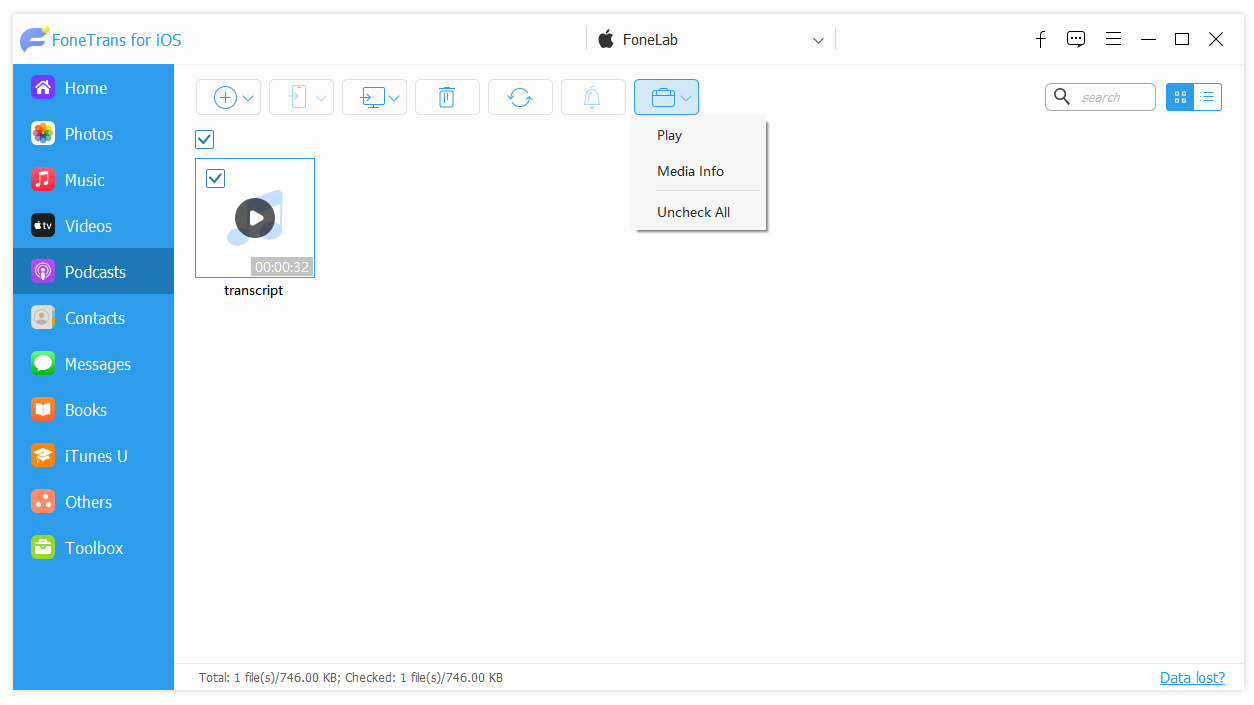
5Play podcasts
Select your podcast file, click more icon and choose Play.
6Media Info
Select more icon on the top and choose Media Info.
Transfer Contacts
1Add contacts to device
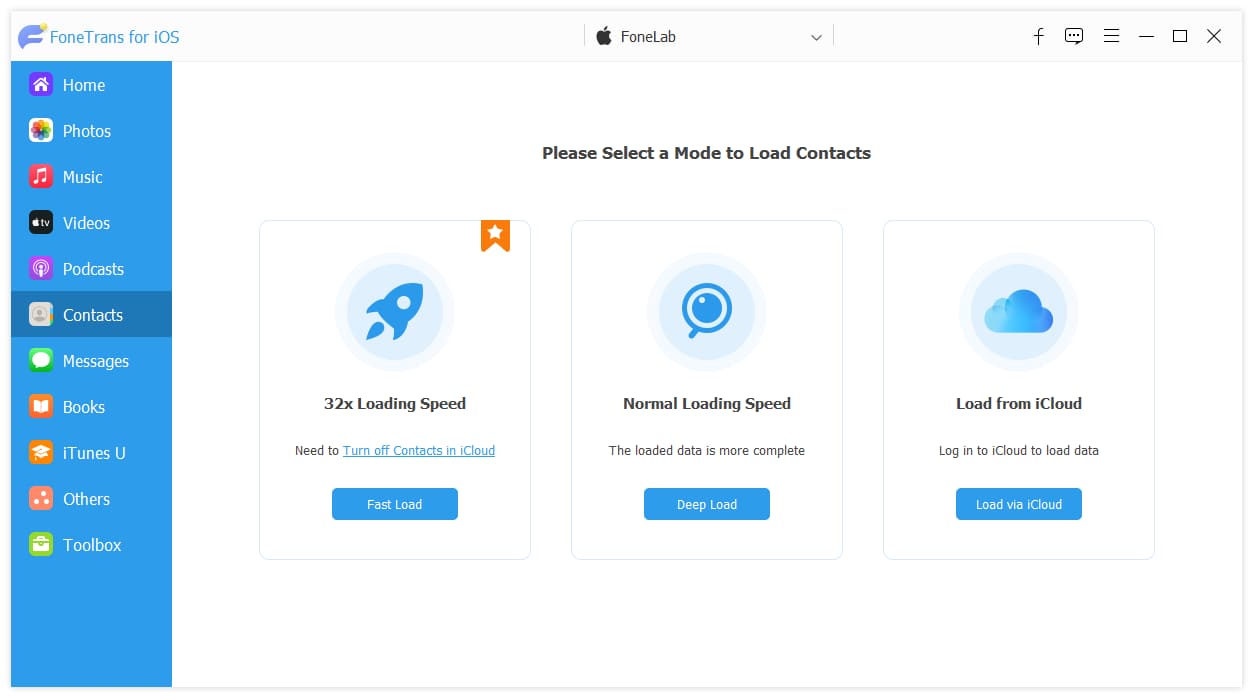
Select Contacts on the left side, choose a mode to load your contacts from your device.
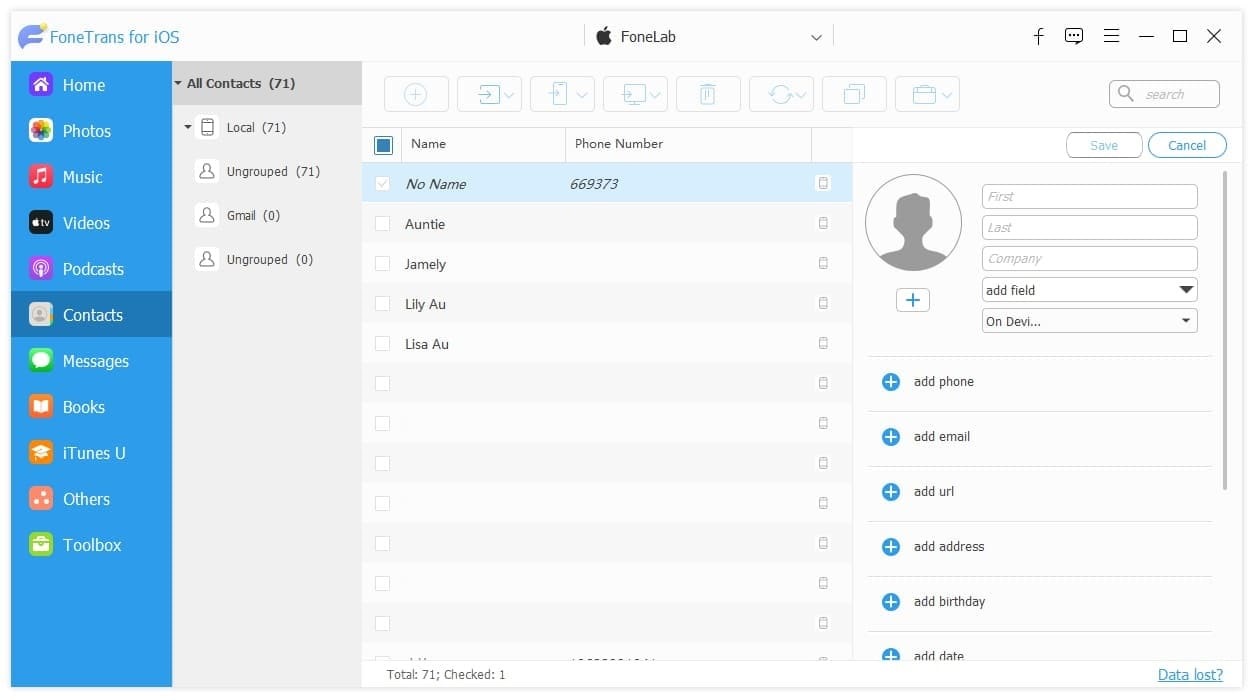
Click the plus icon. Type the info on the right side and click the Save button.
2Import contacts
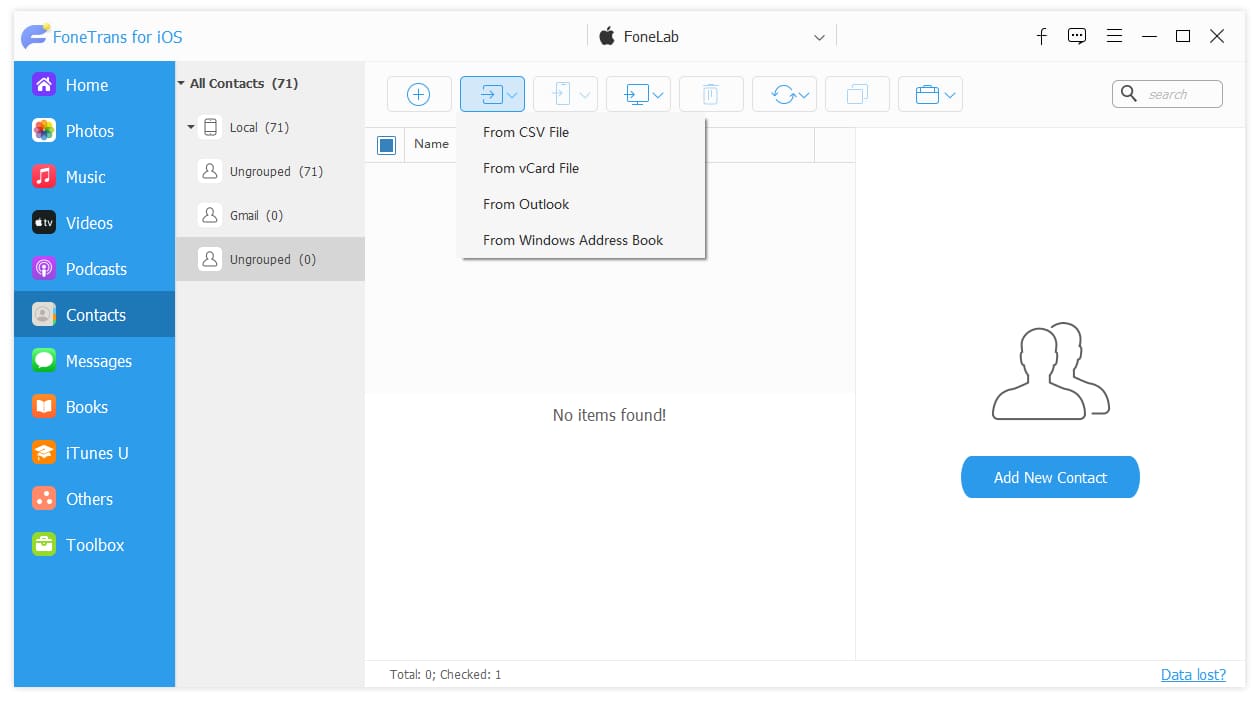
Click the Import icon on the top, choose CSV, vCard, Outlook or Windows Address Book. Then choose files from folder or it will detect your contact info automatically.
3Transfer contacts to another device
Select your files and choose the device icon. Select your desired device to begin.
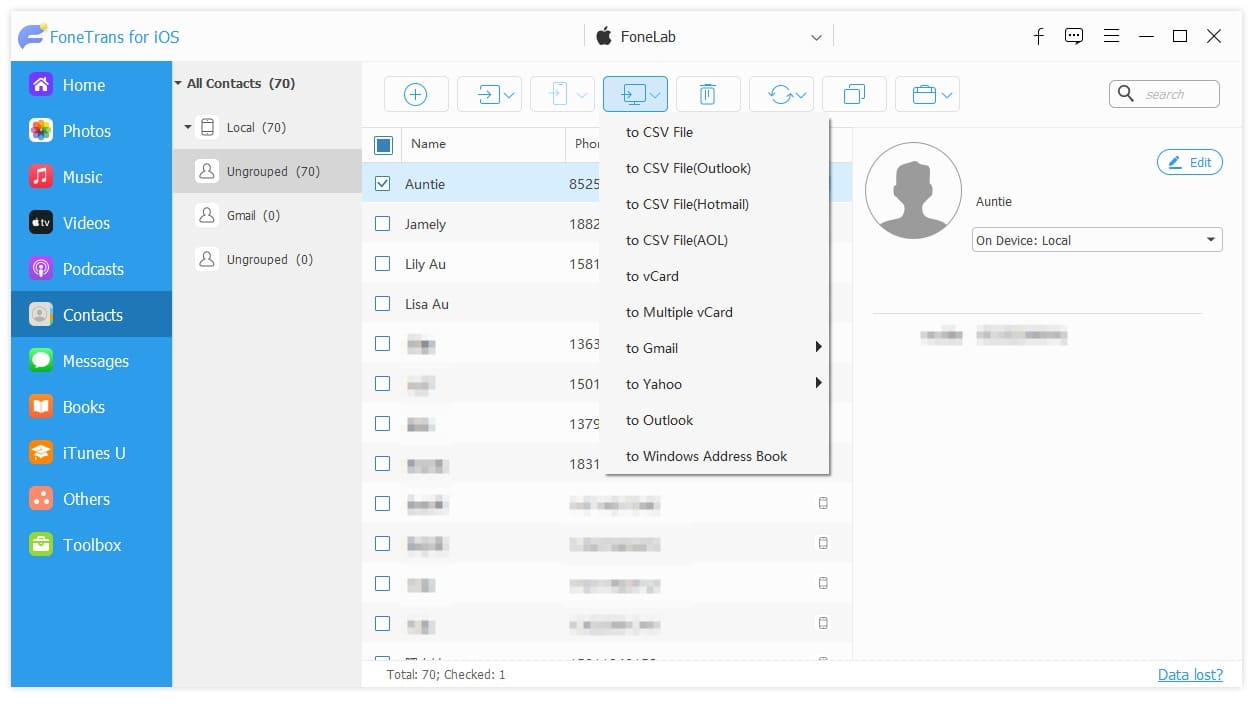
4Export contacts
Select your files and choose the export icon. Select your desired way to do it.
4Delete contacts
Select your contacts and then click the delete icon.
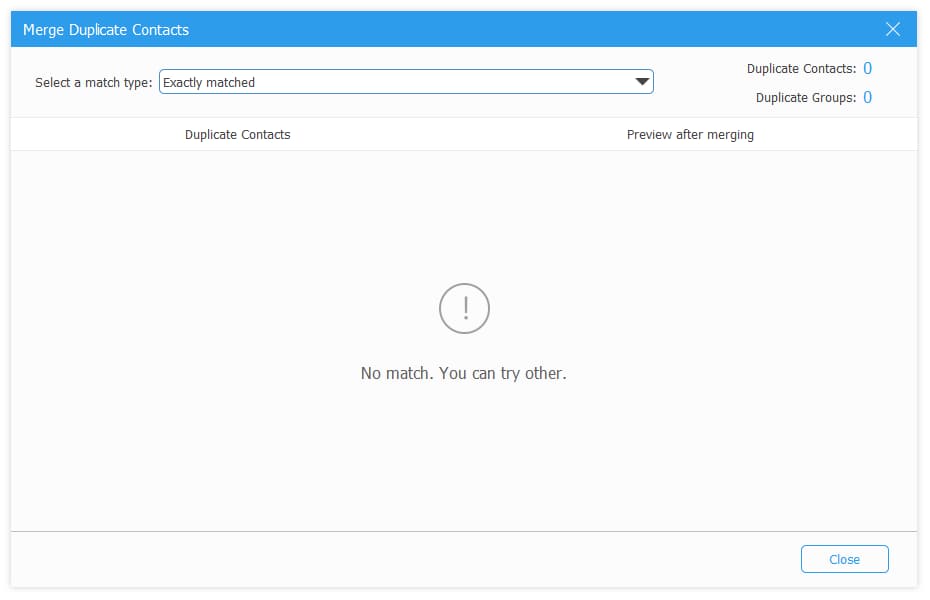
5Find duplicate contacts
Select the duplicated icon, it will find the duplicate ones automatically.
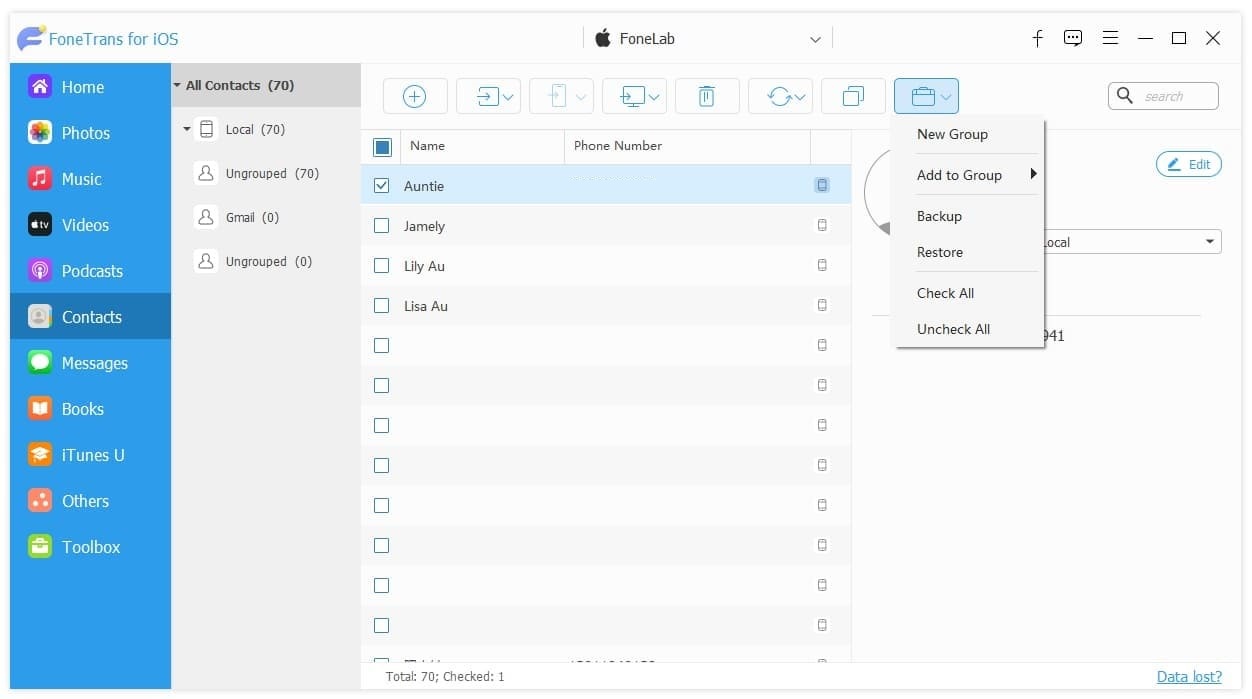
6Group management
Select more icon on the top and choose Add to Group. You can also click the New Group to create a new one.
7Backup and Restore
Select more icon on the top and choose Backup or Restore.
Transfer Books
1Add books to device
Select Books then Audiobooks or Books on the left side, click the plus icon and choose your files.
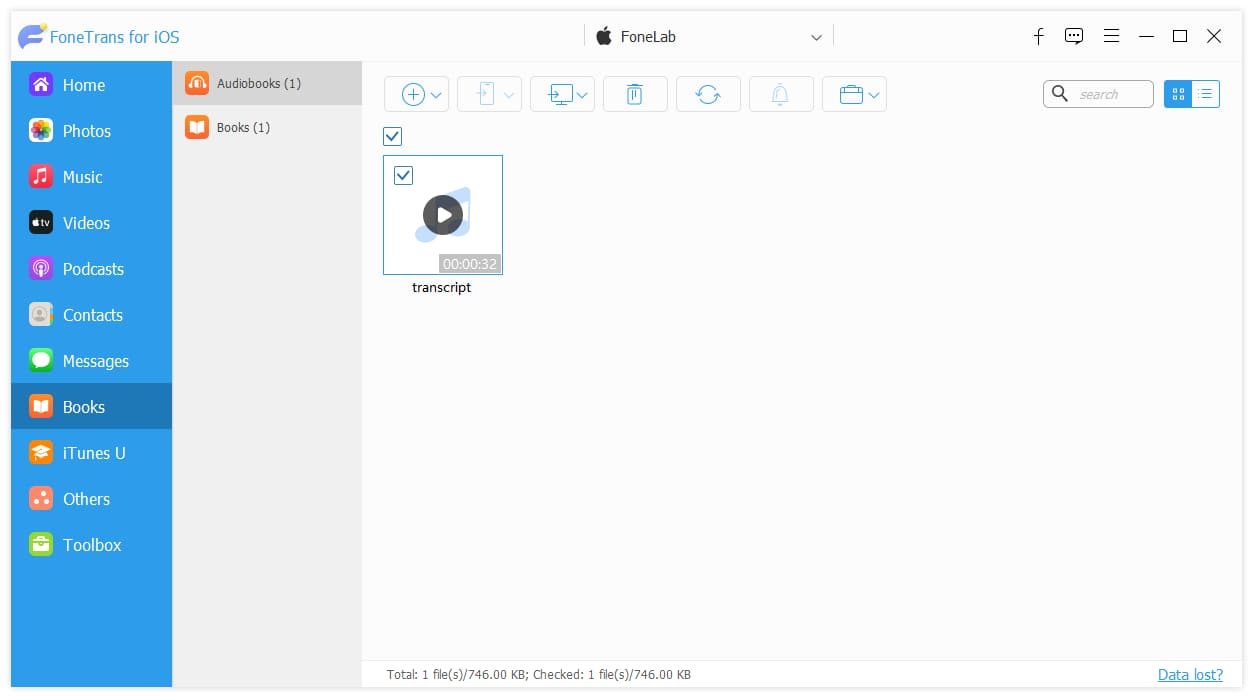
2Transfer books to another device
Choose your desired files and click the device icon on the top. Choose your device from the list.
3Move books to PC/iTunes
Select your files and choose the computer icon. Select Export to PC or Export to iTunes.
4Delete books to device
Select your files and then click the delete icon.
5Play audiobooks
Select your video file, click more icon and choose Play.
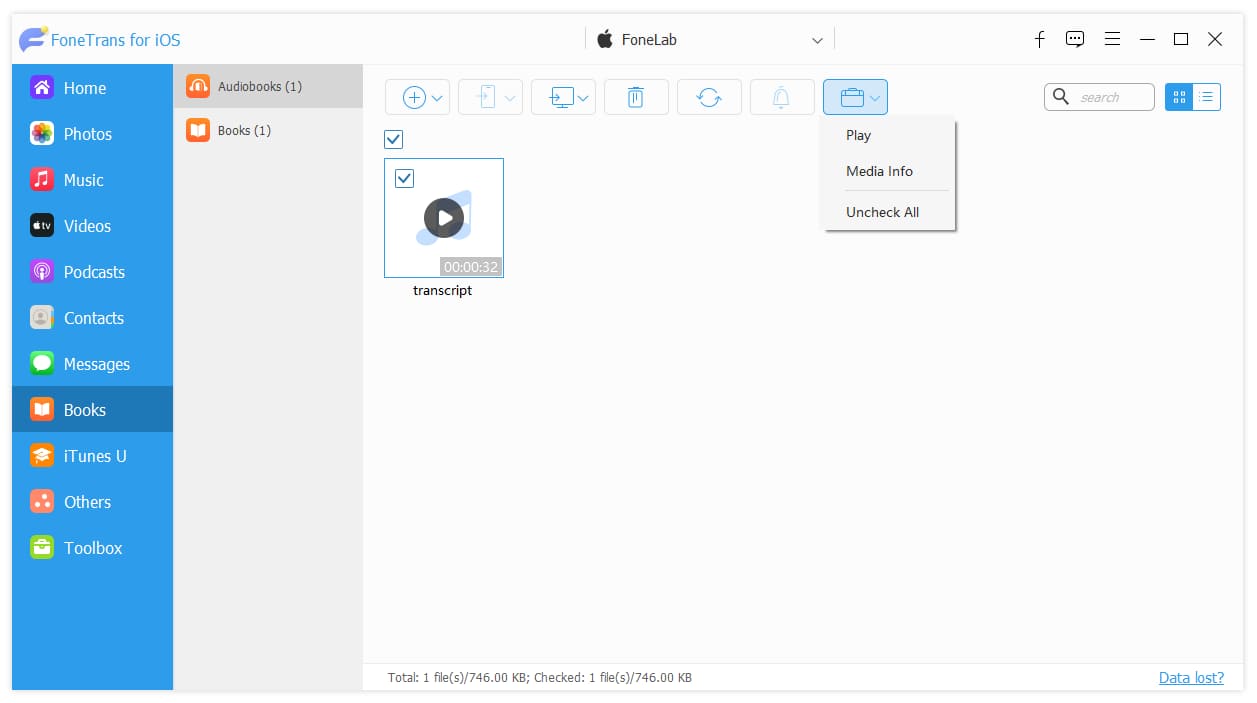
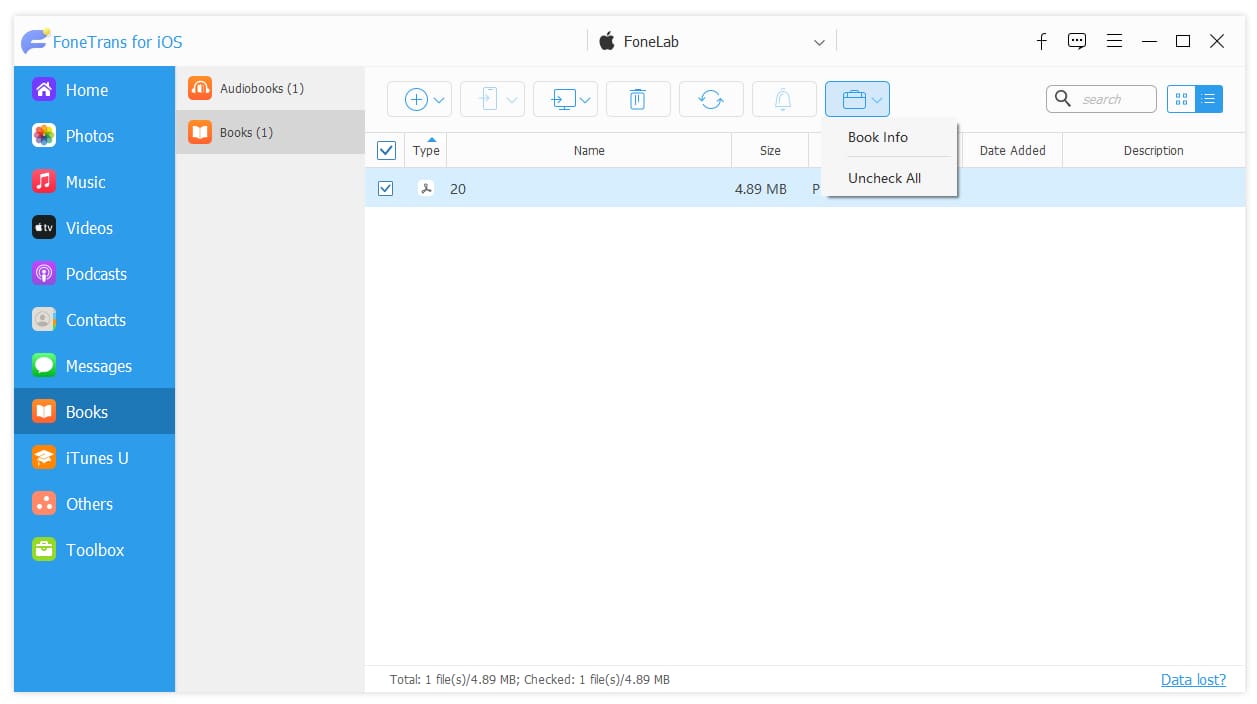
6Book Info
Select more icon on the top and choose Book Info.
Transfer iTunes U
1Add iTunes U to device
Select iTunes U on the left side, click the plus icon and choose your files.
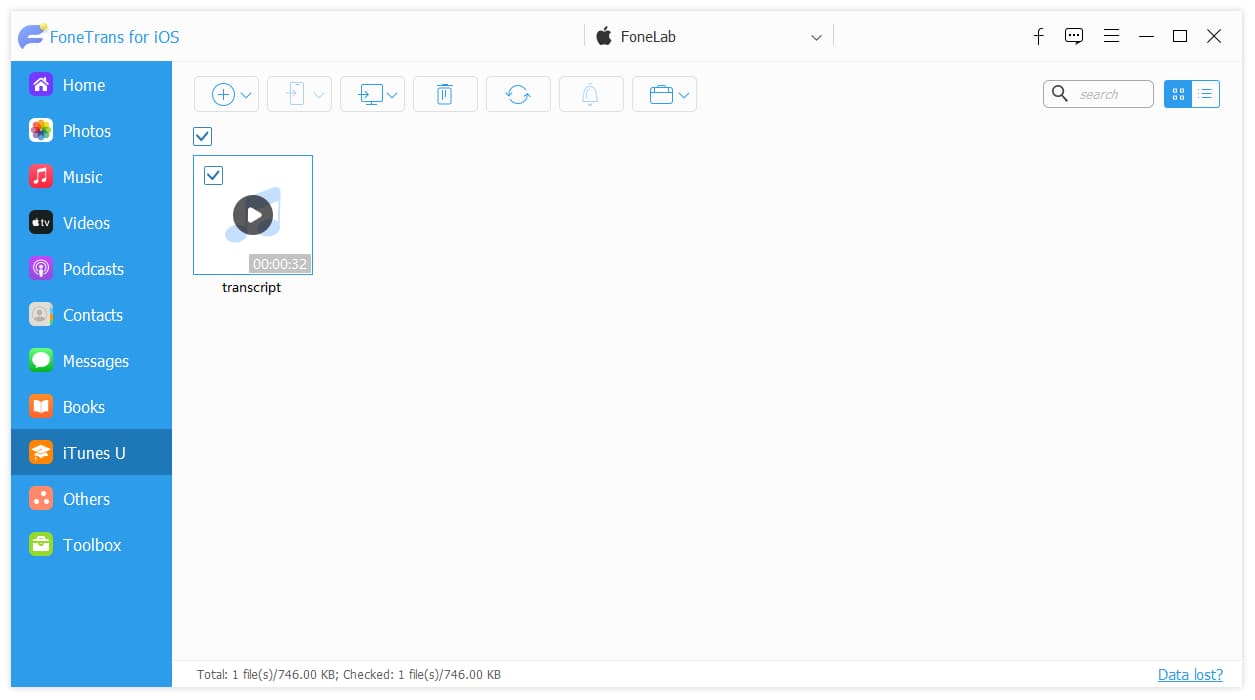
2Transfer iTunes U to another device
Choose your desired files and click the device icon on the top. Choose your device from the list.
3Move iTunes U to PC/iTunes
Select your files and choose the computer icon. Select Export to PC or Export to iTunes.
4Delete iTunes U to device
Select your files and then click the delete icon.
5Play iTunes U
Select your file, click more icon and choose Play.
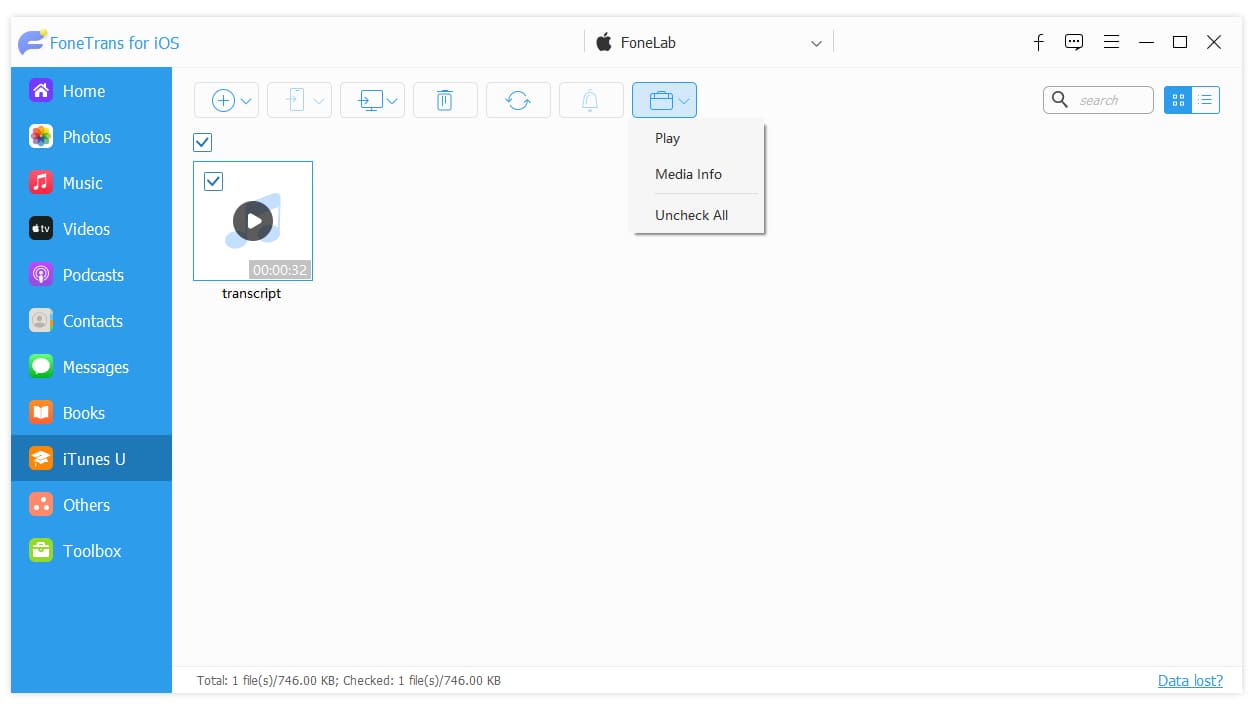
6Media Info
Select more icon on the top and choose Media Info.
Select the last more icon on the left.
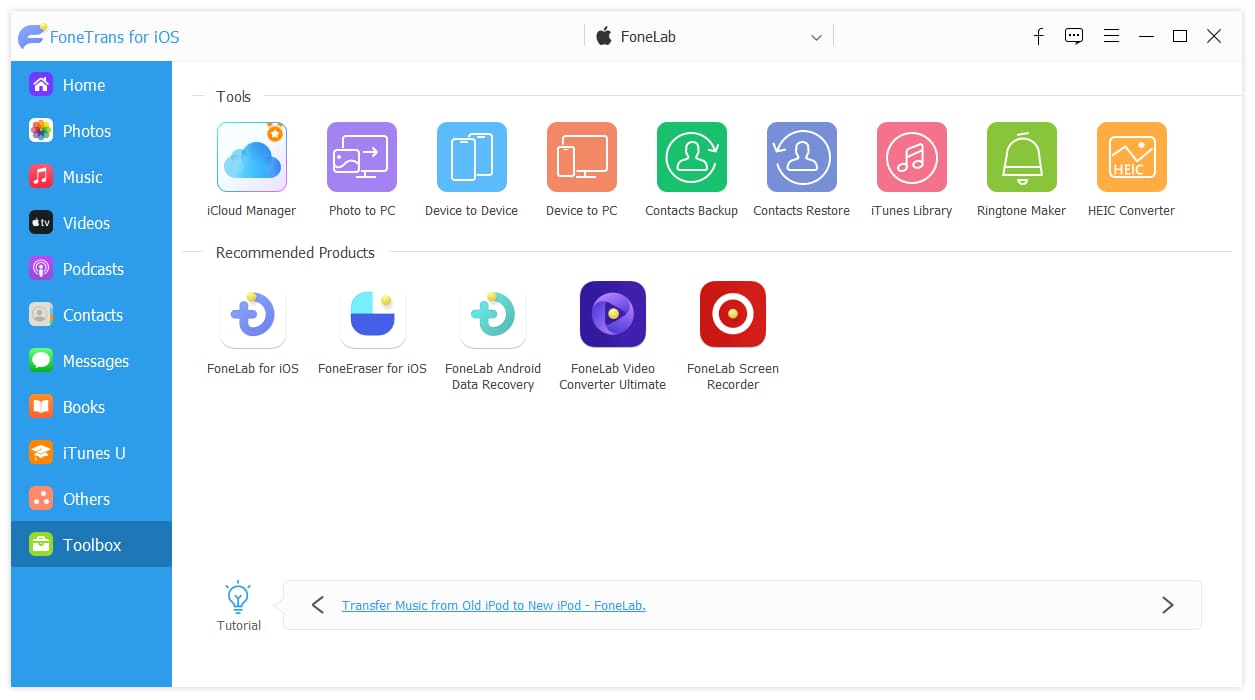
iCloud Management
Log into your iCloud account on the interface. It will scan your data after that.
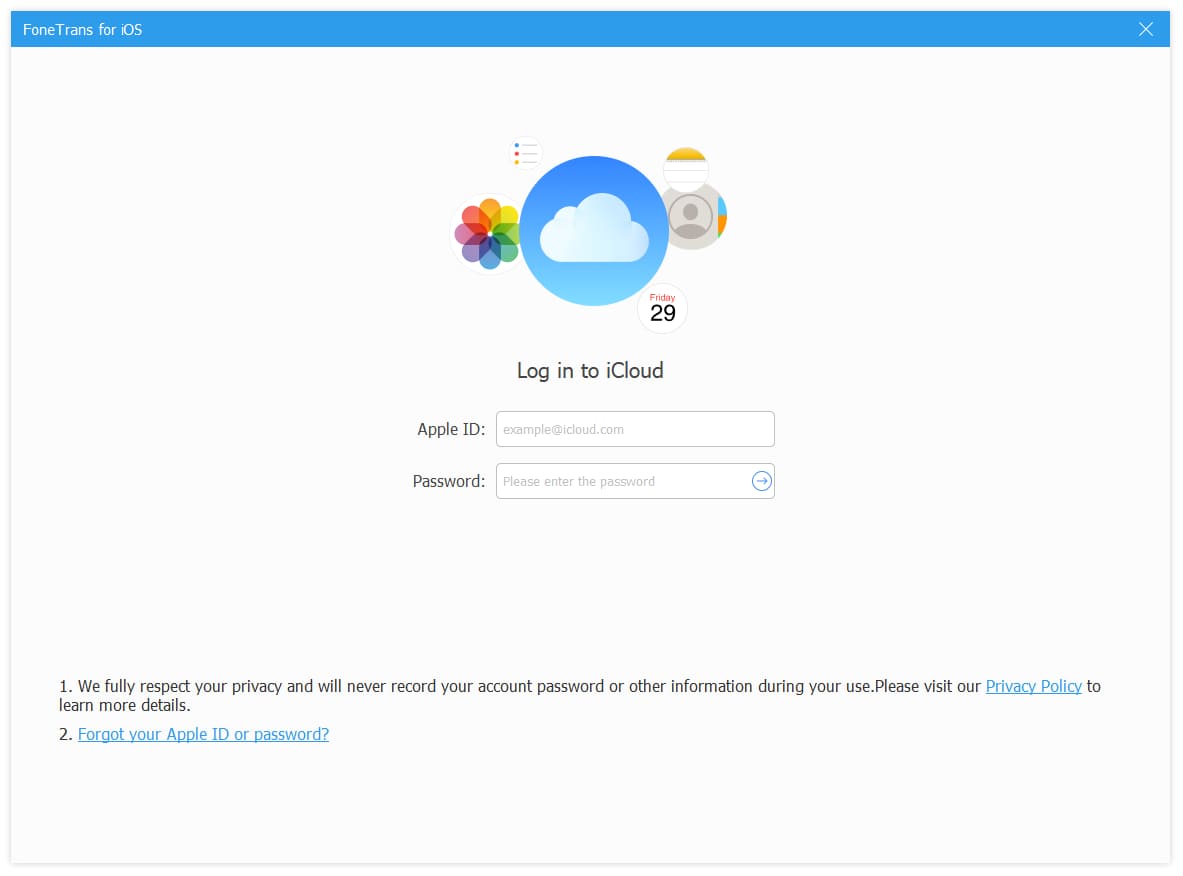
Select Photos, Contacts, Notes, Calendar or Reminders on the left and transfer them accordingly.
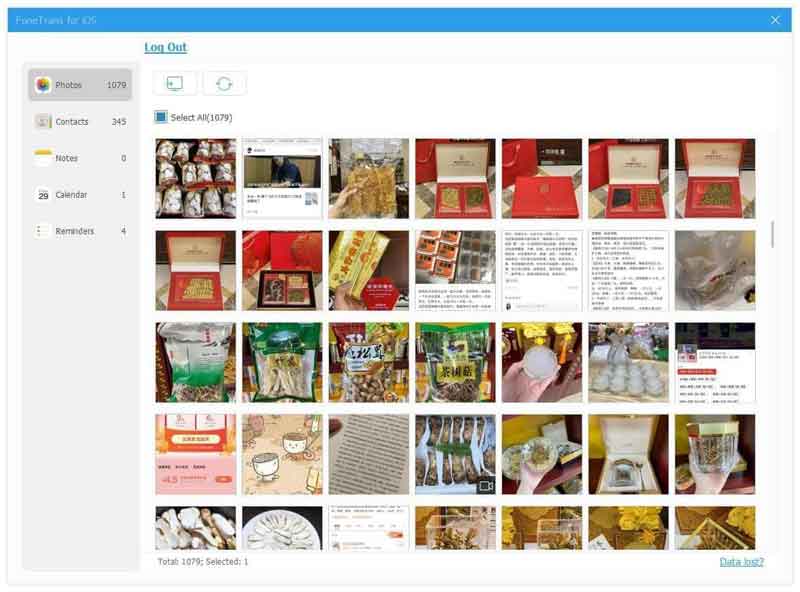
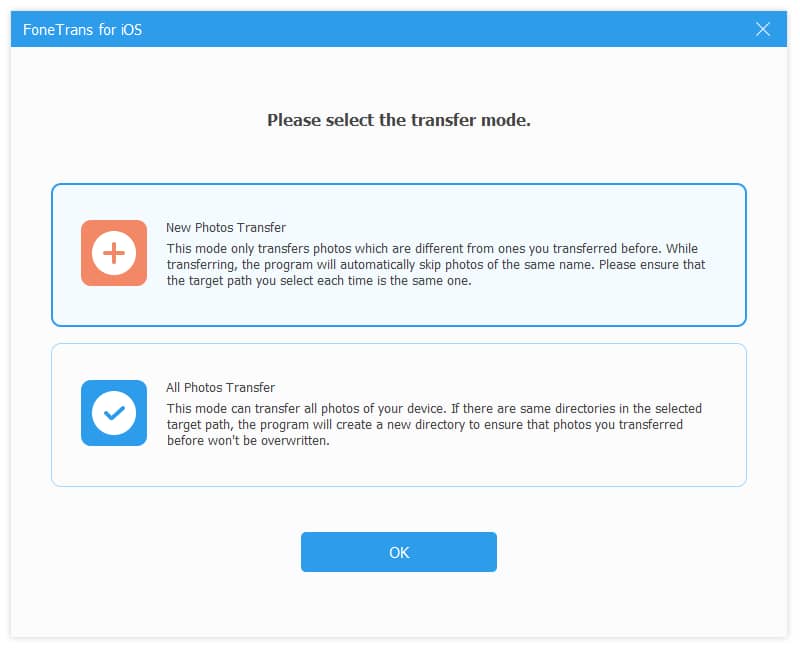
Photo to PC
Select New Photo Transfer or All Photos Transfer, click OK button.
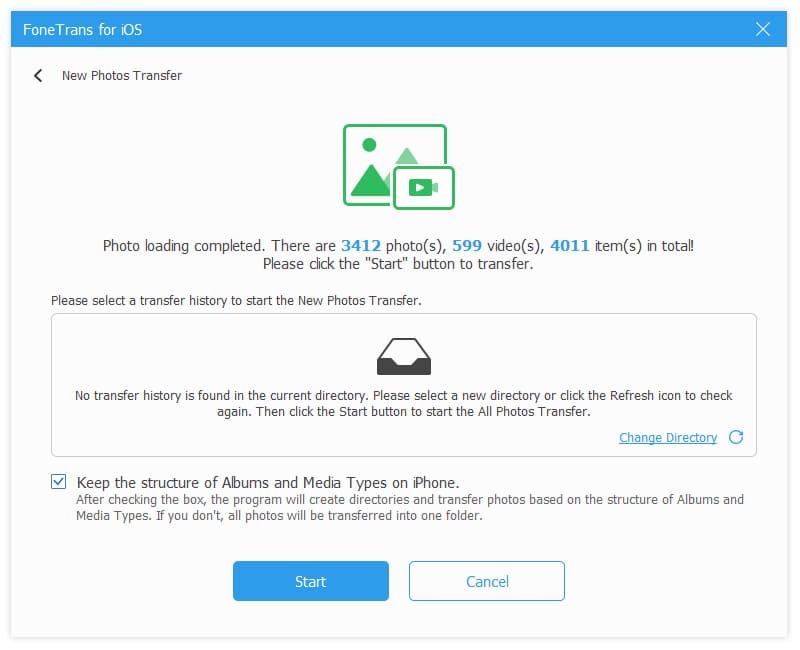
Confirm if you want to keep the structure of albums and media types. Click Start button.
Device to Device
Select the data you want to transfer, click Start button.
Device to PC
Select the data you want to transfer and click Start button.
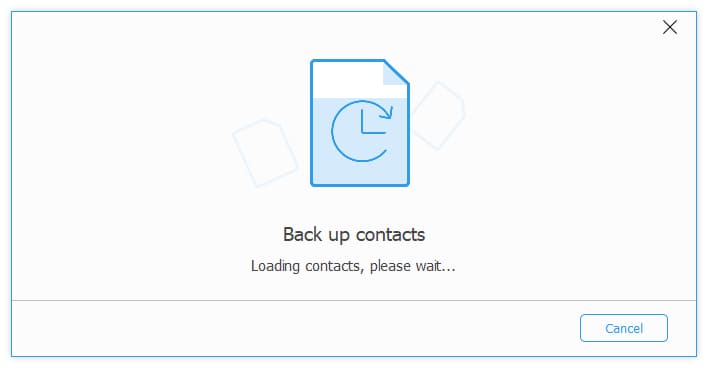
Contacts Backup
Select Contacts Backup from the Toolbox interface, and it will load your contacts.
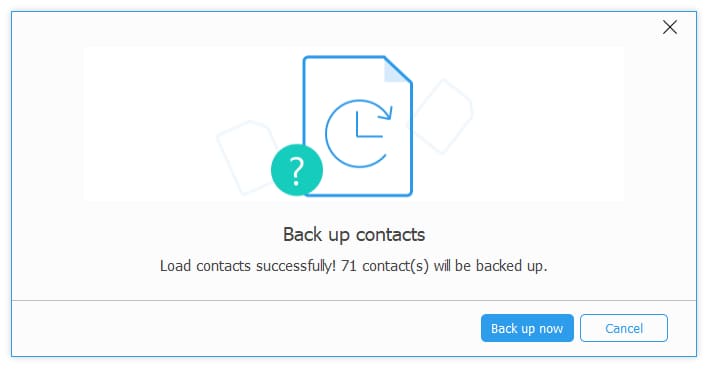
After that, click Back up now button to begin to backup your contacts automatically.
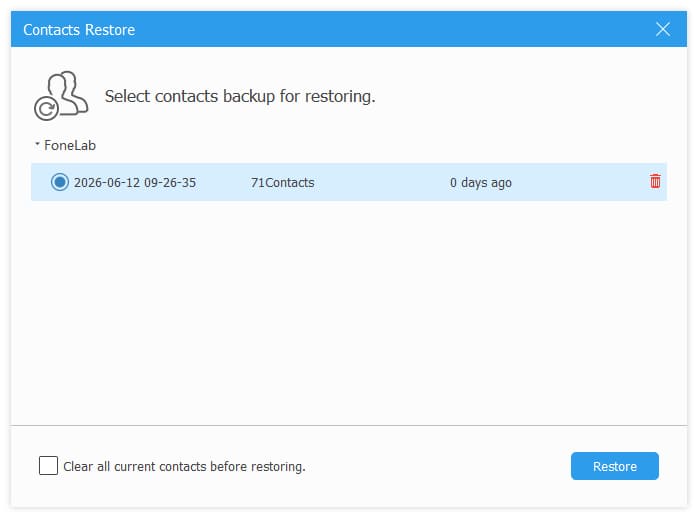
Contacts Restore
Select a backup file from the list and click Restore button
iTunes Library
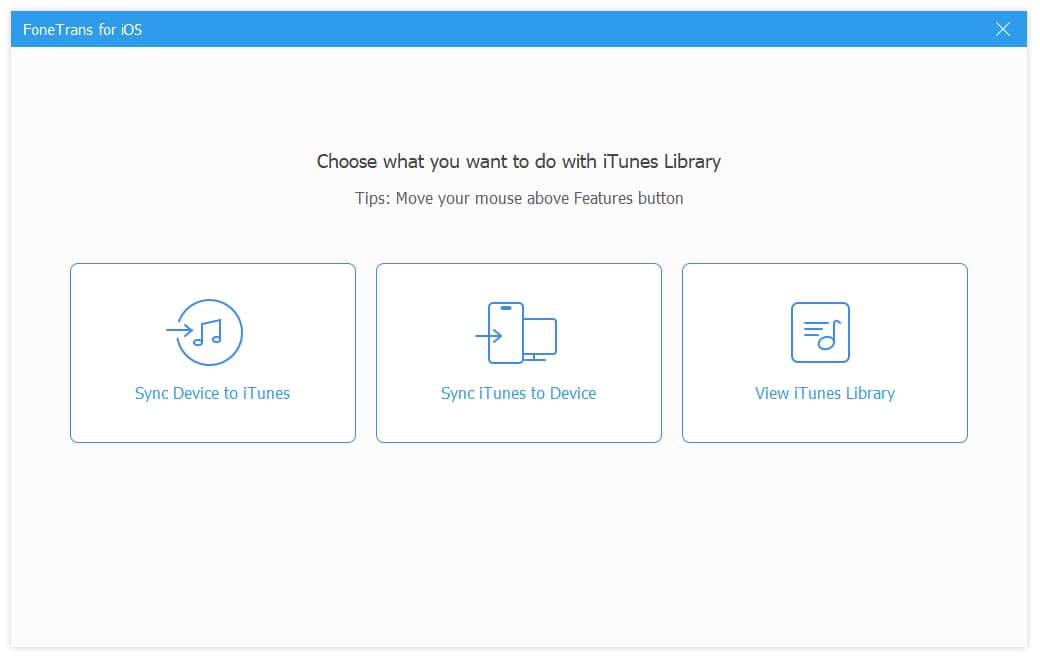
Select Sync Device to iTunes, Sync iTuens to Device or View iTunes Library on the interface.
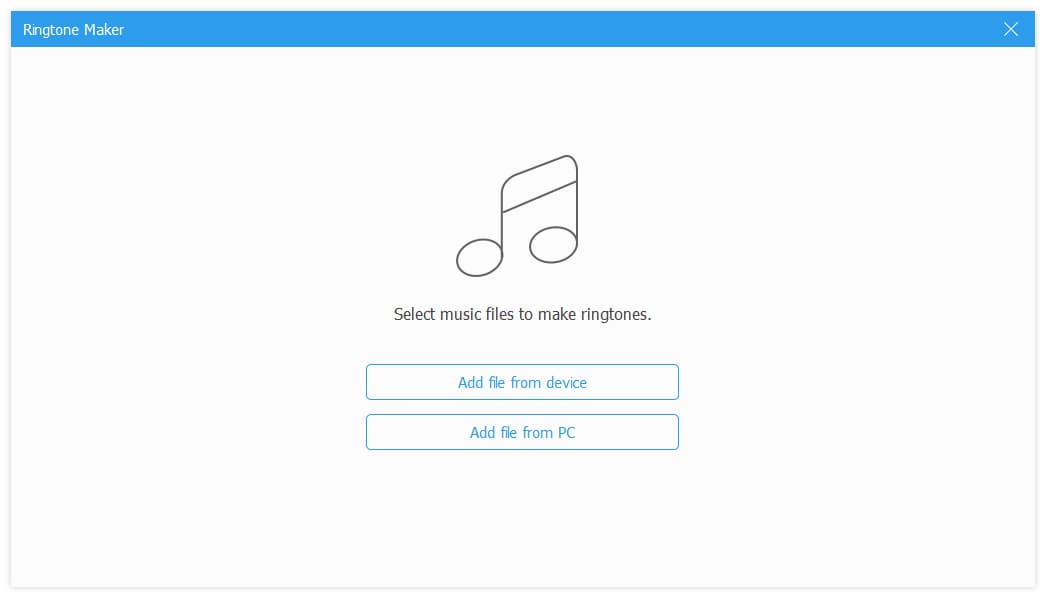
Ringtone Maker
Select Add file from device or Add file from PC.
Adjust the ringtone and finally click Generate button.
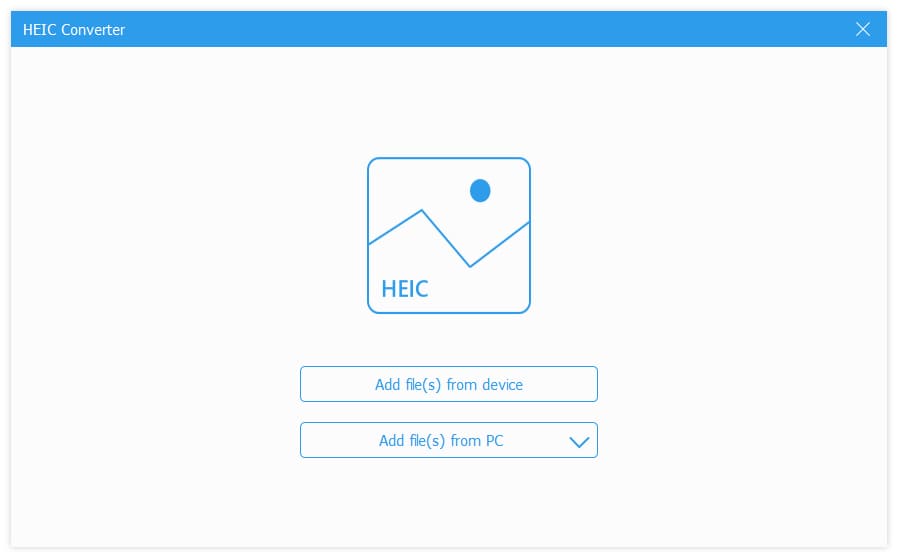
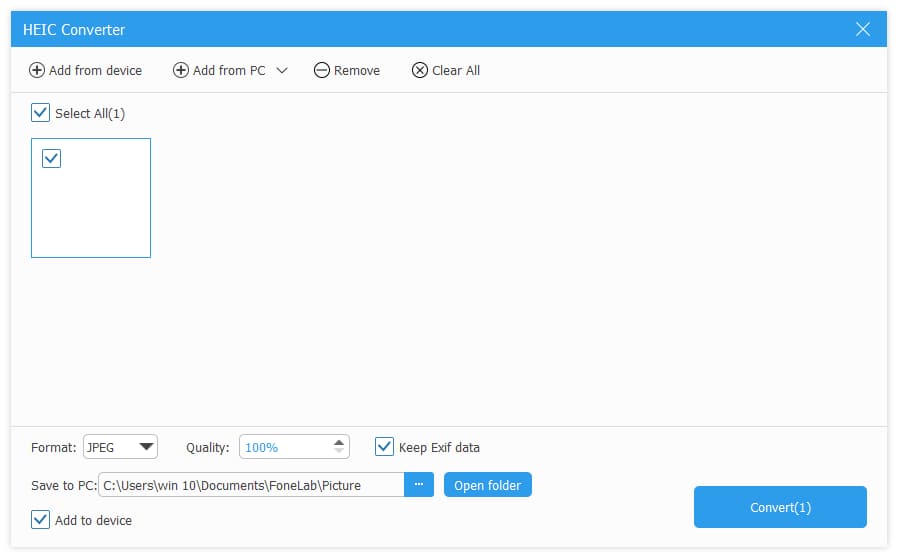
HEIC Converter
Select Add file(s) from device or Add file(s) from PC.
Choose the output format and click Convert button.

 iPhone Data Recovery
 iOS System Recovery
 iOS Data Backup & Restore
 iOS Unlocker
 iPhone Password Manager
 Location Changer
 Android Data Recovery
 Broken Android Data Extraction
 Android Data Backup & Restore
 Android Unlocker
 FoneTrans for iOS
 iPhone Data Eraser
 iPhone Cleaner
 HEIC Converter
 HyperTrans
 WhatsApp Transfer for iOS
 Mac Sweep
 Data Retriever
 Mac Data Retriever
 Video Converter Ultimate
 Screen Recorder
 Phone Mirror


