- Part 1: How to Sync iPhone Photos to Mac with iCloud
- Part 2: How to Sync iPhone Photos to Mac with Google Photos
- Part 3: How to Transfer Photos from iPhone to Mac and Delete from Phone via AirDrop
- Part 4: How to Transfer Photos from iPhone to Mac and Delete from Phone via USB Cable
- Part 5: How to Sync iPhone Photos to Mac with iTunes/Finder
- Part 6: How to Transfer Photos from iPhone to Mac and Delete from Phone via FoneTrans for iOS
- Part 7: FAQs About How to Transfer Photos from iPhone to Mac
Learn How to Transfer Photos from iPhone to Mac in 6 Proven Ways
 Updated by szeki / Dec 21, 2021 13:30
There are various reasons for syncing iPhone photos to Mac. First, the list of reasons is to free up memory space on your iPhone. To do so, you can begin by moving your photos to your Mac then deleting them on your phone. The following reason you would want to sync iPhone photos to Mac is that you want to back up or store your photos somewhere safer. Mobile phones are at much more risk of data loss and memory space shortage than computers. Another reason is for accessibility or work purposes. Perhaps you are working on something on your Mac, and you need these photos from your iPhone in there. Also, you probably want to access your photos on your Mac.
With all these points in mind, there are various methods to transfer photos from iPhone to Mac and delete them or not from your iPhone. Below are 6 different tools and techniques to sync or share pictures from your iPhone to Mac. Provided the reasons above, read until the end of this post, and don't miss out on the best solutions for you.


Guide List
- Part 1: How to Sync iPhone Photos to Mac with iCloud
- Part 2: How to Sync iPhone Photos to Mac with Google Photos
- Part 3: How to Transfer Photos from iPhone to Mac and Delete from Phone via AirDrop
- Part 4: How to Transfer Photos from iPhone to Mac and Delete from Phone via USB Cable
- Part 5: How to Sync iPhone Photos to Mac with iTunes/Finder
- Part 6: How to Transfer Photos from iPhone to Mac and Delete from Phone via FoneTrans for iOS
- Part 7: FAQs About How to Transfer Photos from iPhone to Mac
1. How to Sync iPhone Photos to Mac with iCloud
You can use iCloud to sync photos from your iPhone into your Mac or other devices.
Moreover, iCloud is the default cloud storage service that Apple devices use. That makes iCloud popular in storing your iPhone data, managing, accessing backed up, and restoring them through your Mac. Here is how you can sync iPhone photos to Mac.
Steps on How to Sync iPhone Photos to Mac with iCloud:
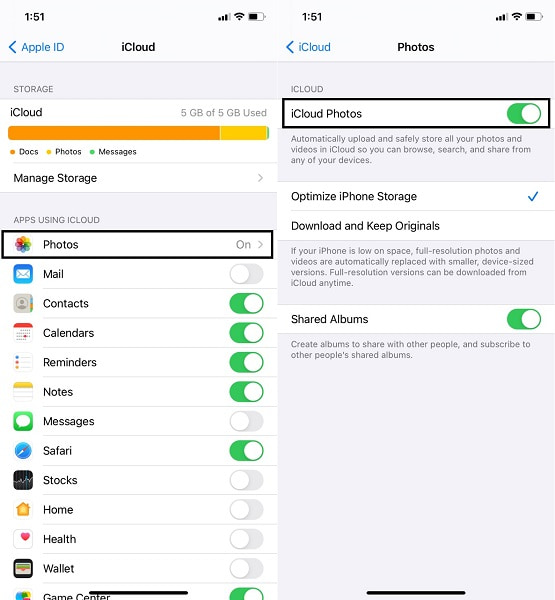
Step 1On your iPhone, go to Settings. After that, tap your name at the top of the screen and pick iCloud from the menu.
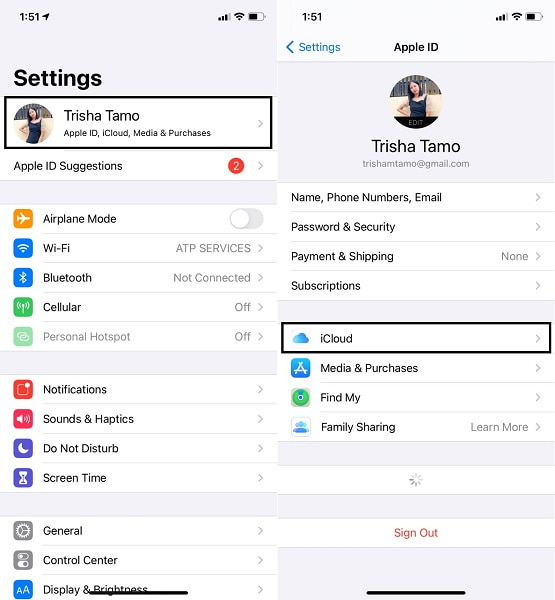
Step 2After that, select Photos, which comes first on the list, then toggle on iCloud Photos or Upload to My Photo Stream.
Step 3On the other hand, go to your Mac's System Preferences and select iCloud.
Step 4Finally, go to Photos and click Options, found in the new iCloud window.
Step 5Lastly, to sync iPhone photos to Mac, enable iCloud Photo or iCloud Photo Library.
You know, iCloud has a 5GB storage limitation, which is why you must look for another cloud service to do this if you have more data. So if you are looking for a solution similar to iCloud, Google Photos is best for you. Likewise, you probably prefer to store your photos on cloud storage so you can access them anytime, anywhere, and save them on your computer afterward.
2. How to Sync iPhone Photos to Mac with Google Photos
Google Photos is a sharing and storage service developed by Google specially made for photos. Additionally, Google Photos is downloadable and accessible on every operating system, making it great to store your images and then download them on other devices, such as your Mac.
Steps on How to Sync iPhone Photos to Mac with Google Photos:
Step 1To begin, download and launch the Google Photos app from the App Store on your iPhone. Following that, sign in or pick your Google Account.
Step 2Navigate to Photos Settings by tapping the profile icon on your screen. Next, go to Back up & Sync and choose Back up.
Step 3Select the folder that contains the pictures you want to sync iPhone photos to Mac after that.
Step 4Finally, access Google Photos on your Mac using Safari.

Step 5From there, select the photos you wish to sync iPhone photos to Mac and open the ellipsis menu from your browser's right corner. Last but not least, click Download to download the photographs to your Mac's local storage.

On the contrary, you are probably looking for a way to transfer your iPhone photos to your Mac directly, then. Suppose you plan to delete them from your iPhone immediately. Well, don't worry because there are other alternatives to that.
3. How to Transfer Photos from iPhone to Mac and Delete from Phone via AirDrop
The quickest and most straightforward method of transferring photos from iPhone to Mac or even to other iOS devices is through AirDrop. AirDrop is a wireless file-sharing mechanism for iOS and macOS devices. In addition, this is a good way of getting off your iPhone then deleting them afterward.
Steps on How to Transfer Photos from iPhone to Mac via AirDrop:
Step 1On both your iPhone and Mac, turn on WiFi, Bluetooth, and AirDrop. To use Airdrop on an iPhone, go to the Control Center, long-press WiFi, and then hit AirDrop. Then choose between Contacts Only and Everyone.
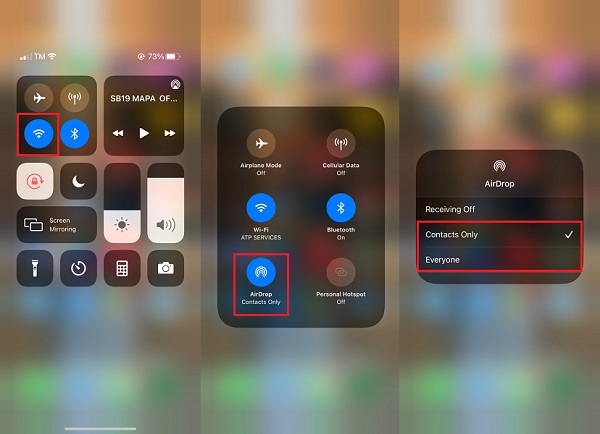
Open the Finder window on your Mac and go to AirDrop. Choose between Contacts Only and Everyone under Allow me to be discovered.

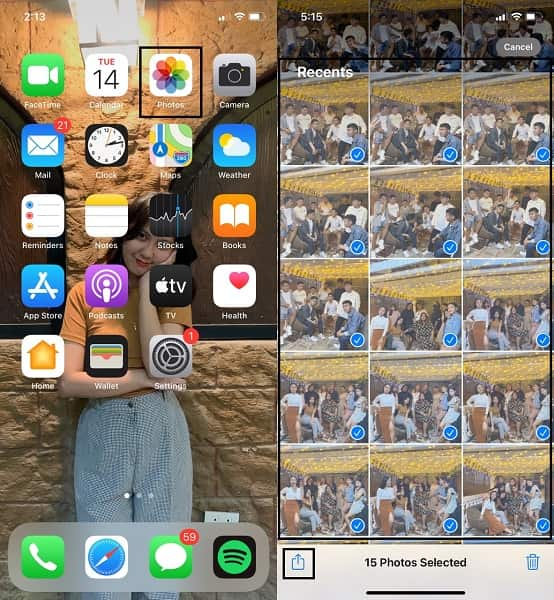
Step 2Next, select those photos you want to transfer to your Mac in the Photos app on your iPhone. After that, tap the Share icon from the left-bottom corner of your screen.
Step 3Eventually, select your Mac's name in the AirDrop section and click Accept on your Mac when prompted. You can find the photographs you shared in the Download folder. After that, you can finally delete those photos from your iPhone.

On the other hand, AirDrop might fail or encounter an error in transferring your photos. With that, you must look for a much direct and effective way of sharing or syncing your iPhone photos with your Mac. That is why transferring through a USB will be much better then.
4. How to Transfer Photos from iPhone to Mac and Delete from Phone via USB Cable
Transferring through a USB is an effective method of transferring iPhone data, especially for photos, because it is much safer, effective, and direct. Moreover, this is much easier because you will have more control over transferring and saving them on your Mac.
Steps on How to Transfer Photos from iPhone to Mac via USB Cable:
Step 1To begin, use a USB cord to connect your iPhone to your Mac. If a message box shows on your iPhone, tap Trust. Then, on your Mac, open the iPhoto or Photos program.
Step 2After a few seconds, your Mac's screen will display all of the photos on your Camera Roll. Select the images you want to import onto your Mac from there. Finally, go to the top of your screen and select Library, then New Album for your photos. After that, you can finally delete those photos from your iPhone.
Alternatively, you can use another default device management utility provided by Apple. Moreover, iTunes or Finder is another way of syncing iPhone photos through USB.
5. How to Sync iPhone Photos to Mac with iTunes/Finder
As mentioned above, Apple's default data management tools for iOS devices are iTunes and Finder. In contrast to iCloud, Finder and iTunes sync iPhone photos to Mac directly from your iPhone rather than your backup files. Moving on, if your Mac is running a macOS Catalina or later version, use Finder. If not, use iTunes instead.
Steps on How to Sync iPhone Photos to Mac with iTunes/Finder:
Step 1To begin, launch iTunes or the Finder on your Mac. Connect your iPhone to your Mac using a USB cable simultaneously.
Step 2Second, from the sidebar, select your iPhone's name. After that, go to the top of the panel and choose Photos.
Step 3Eventually, tick the box next to Sync Photos. Select Photos, Pictures, or a folder from iCloud that you want to sync to your Mac.
Step 4Finally, on your Mac, choose whatever photos you want to sync. Tick the box beside Only Favorites, Videos, or All Photos to determine which to sync. Finally, after everything is in place, click apply.
Nevertheless, nothing beats a third-party tool that is guaranteed and proven effective, efficient, and user-friendly. Moreover, FoneTrans for iOS is designed for transferring photos in bulk, selectively, or your whole camera roll to your computer.
6. How to Transfer Photos from iPhone to Mac and Delete from Phone via FoneTrans for iOS
The best third-party tool for Mac and Windows is FoneTrans for iOS. FoneTrans for iOS allows you to transfer photos without losing quality. Moreover, this tool has a preview feature and fast loading, making it efficient. You are also entitled to manage and transfer iPhone data to or from your computer or between 2 devices.
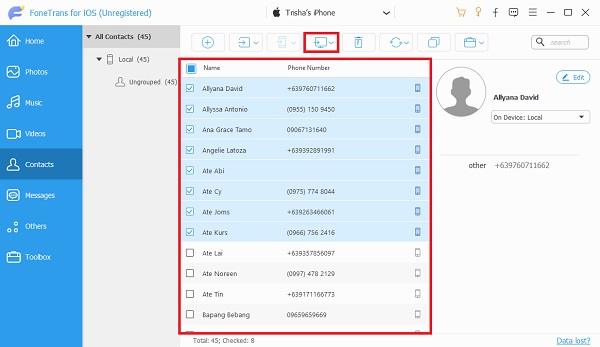
With FoneTrans for iOS, you will enjoy freedom to transfer your data from iPhone to computer. You can not only transfer iPhone text messages to computer, but also photos, videos and contacts can be moved to PC easily.
- Transfer photos, videos, contacts, WhatsApp, and more data with ease.
- Preview data before transferring.
- iPhone, iPad and iPod touch are available.
Steps on How to Transfer Photos from iPhone to Mac via FoneTrans for iOS:
Step 1Begin by downloading and installing FoneTrans for iOS for Mac on your Mac.
Meanwhile, use a USB cord to connect your iPhone to Mac.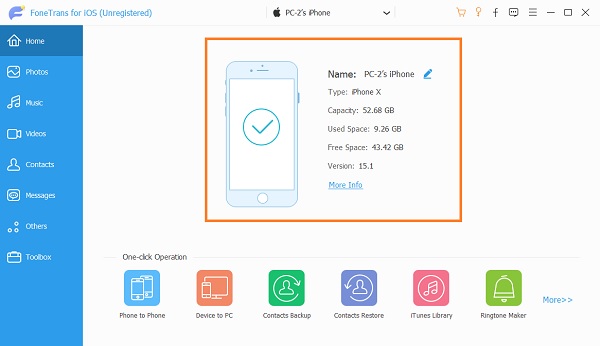
Step 2When FoneTrans for iOS has successfully recognized your iPhone, go to the left side of the screen and select Photos.
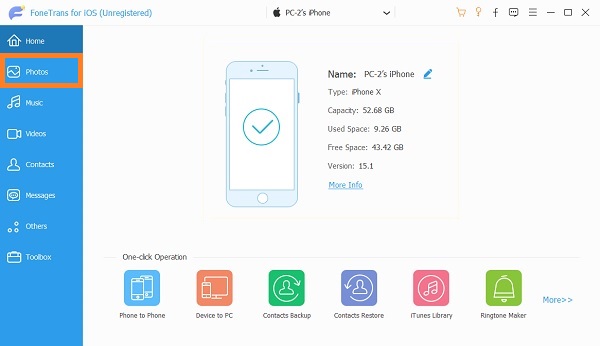
Step 3After that, all photos will appear on the panel's preview side. Select the images you wish to transfer to your Mac and click the Export button from there. You'll be able to delete those photos off your iPhone at long last.
7. FAQs About How to Transfer Photos from iPhone to Mac
Why can't I transfer photos from iPhone to Mac?
Suppose you are having trouble transferring your iPhone photos to your Mac. In that case, your operating systems on both devices might not be compatible. There is also a possibility that Apple, iCloud, or Google photos have a system update.
Why are my iCloud photos not showing up on my Mac?
The most common reason for photos not syncing or showing up on your Mac are as follows: Sync for photos is off on your iPhone and Mac; you did not connect your iPhone or Mac to the Internet, so pictures fail to reflect between devices; lastly, maybe your iCloud storage is full, so your photos are no more extended syncing thus not showing on your Mac.
With FoneTrans for iOS, you will enjoy freedom to transfer your data from iPhone to computer. You can not only transfer iPhone text messages to computer, but also photos, videos and contacts can be moved to PC easily.
- Transfer photos, videos, contacts, WhatsApp, and more data with ease.
- Preview data before transferring.
- iPhone, iPad and iPod touch are available.
To summarize, given above are 6 distinct methods of transferring photos from iPhone to Mac. FoneTrans for iOS stands out the most for its performance with all the solutions above. The best feature of a transferring tool is its efficiency, versatility, affectivity, and security, which are all the features of FoneTrans for iOS. Nevertheless, you have complete discretion on which tool to transfer your photos from iPhone to Mac.